Laser Engraving Machines
Laser Engraving Clear Acrylic
Title: Mastering Laser Engraving with the Thunder Bolt: A Step-by-Step Vlog
Welcome to another exciting vlog at MaxLaser, where today we’re diving deep into the capabilities of our Thunder Bolt laser machine. We’ve taken on an ambitious project – engraving and cutting a checkers board complete with its pieces. Through this project, we’ll explore why the Thunder Bolt, with its 30-watt metal laser tube, is perfect for detailed engraving on clear cast acrylic, and how we tackled some unexpected challenges along the way.
The Choice of Material
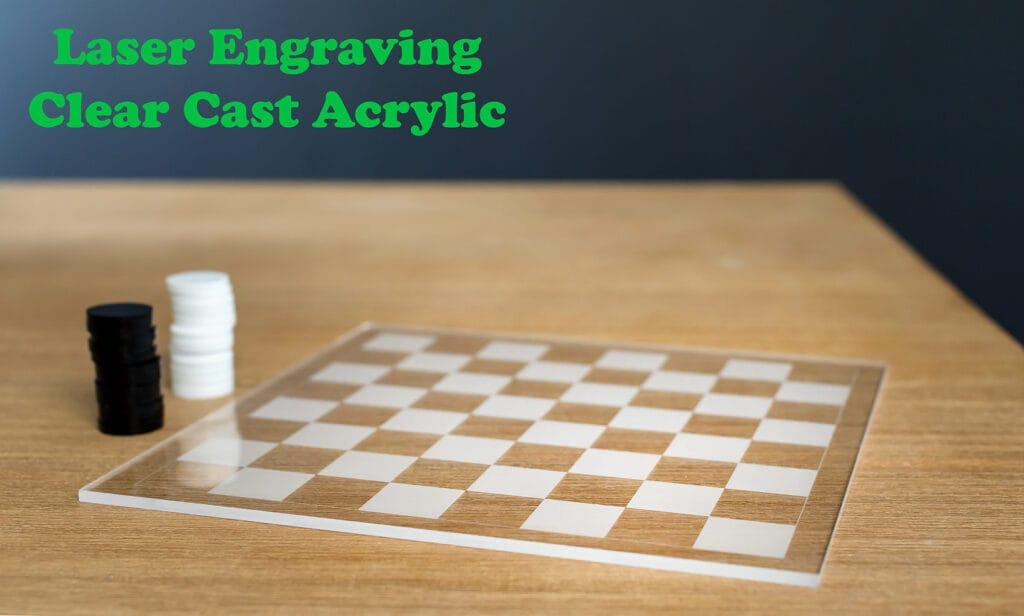
Our choice of material for this project was clear cast acrylic, and there’s a good reason for that. Unlike extruded acrylic, which tends to leave a dull, clear finish when engraved, clear cast acrylic offers a stunning, frost-like white finish that beautifully highlights the design. This makes it ideal for projects where clarity and detail are paramount, despite its higher cost.
Designing the Checkers Board
The board itself was designed to be both elegant and functional, made entirely out of 5mm thick clear cast acrylic. The checkers pieces were cut from 5mm white and black acrylic, creating a classic, contrasting look. The entire design was crafted in CorelDraw and exported to LightBurn, which is my preferred software for laser projects due to its versatility and user-friendly interface.
Overcoming Engraving Challenges
Initially, I thought this would be a straightforward project. However, I soon realized that the larger engraved areas of the checkers squares were not as consistent as I had hoped, displaying visible lines and uneven depths. This inconsistency is a common issue when the focus is set purely based on the auto-focus feature, which in our case, set the z-axis height at 2.3mm.
To achieve a more uniform, frosted appearance across the engraved areas, I experimented with adjusting the focus manually. By lowering the z-axis height slightly to 1.6mm, I was able to enhance the machine’s focus, which significantly improved the quality of the engraving. This adjustment allowed the laser to melt rather than vaporize the acrylic, creating smoother, more consistent engravings without the unsightly lines.
Fine-Tuning the Settings
After several tests to find the optimal setup, I settled on specific settings that yielded the best results: a speed of 1000mm/s, power at 18%, and a DPI setting of 500. This combination provided a consistent, band-free finish that truly brought out the elegance of the design. Additionally, turning off the air assist helped minimize the creation of dust during the engraving process, which simplified the cleanup afterward and preserved the pristine look of the acrylic.
Final Thoughts and Tips
This project, while challenging, was immensely rewarding. It not only demonstrated the precision and adaptability of the Thunder Bolt but also highlighted the importance of material choice and machine settings in achieving the desired finish in laser engraving.
For those of you interested in laser engraving, especially on clear acrylic, remember to experiment with focus adjustments beyond the auto-settings. Small changes can make a big difference in the quality of your final product. Also, consider the DPI and power settings based on the effect you want to achieve and the material you are using.
Join Us for More Insights
I hope this vlog has illuminated some of the finer points of working with laser engravers like the Thunder Bolt and clear cast acrylic. For more tips, tricks, and detailed tutorials, don’t forget to follow us on the MaxLaser YouTube channel. We’re always excited to share our knowledge and help you achieve stunning results in your projects.
Thank you for tuning in, and we can’t wait to see what you create with these techniques!

