Laser Cutting Machines, Laser Engraving Machines, Laser Materials, Maxlaser Academy
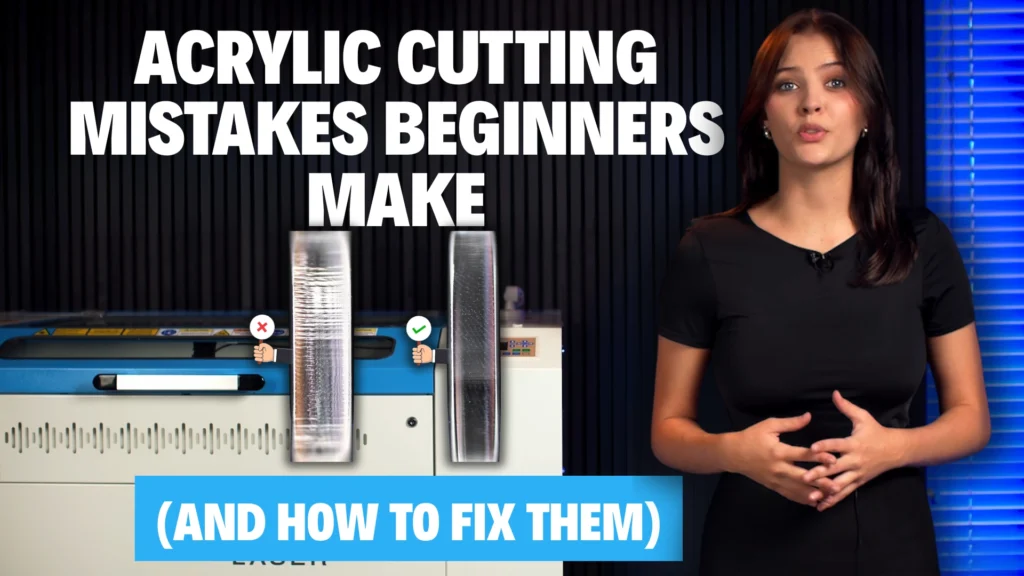
Acrylic Cutting Mistakes Beginners Make (and How to Fix Them)
Apr
If your acrylic cuts are coming out melted, cloudy, rough, or inconsistent, the problem is usually not your laser machine — it’s your setup, your material choice, or your understanding of how acrylic behaves under heat.
Laser cutting acrylic is one of the easiest processes to learn, but it’s also one of the easiest to get wrong if you approach it like MDF or wood.
Unlike wood, acrylic does not burn away — it melts and then re-solidifies. That means your final result is directly influenced by how well you control heat during the cut.
If you’re laser cutting acrylic in South Africa, understanding these common mistakes will save you time, reduce wasted material, and help you produce consistently professional results.
In this guide, we’ll go through the most common mistakes beginners make — and more importantly, how to fix them properly.
Why Acrylic Can Be Difficult for Beginners
Acrylic behaves very differently from most materials used in laser cutting.
Instead of vaporising cleanly, it:
- melts under heat
- flows slightly at the cut edge
- then re-solidifies
This is what creates that polished, glass-like edge — but only when heat is controlled correctly.
If not, you get:
- melted edges
- cloudy finishes
- rough or inconsistent cuts
KEY INSIGHT
Acrylic doesn’t “cut” the same way wood does — it forms its finish during the cut itself.
MISTAKE 1:
USING THE WRONG TYPE OF ACRYLIC
The Problem
Using extruded acrylic instead of cast acrylic.
What Happens
- edges lack polish
- engraving looks dull
- inconsistent heat behaviour
The Fix
MISTAKE 2:
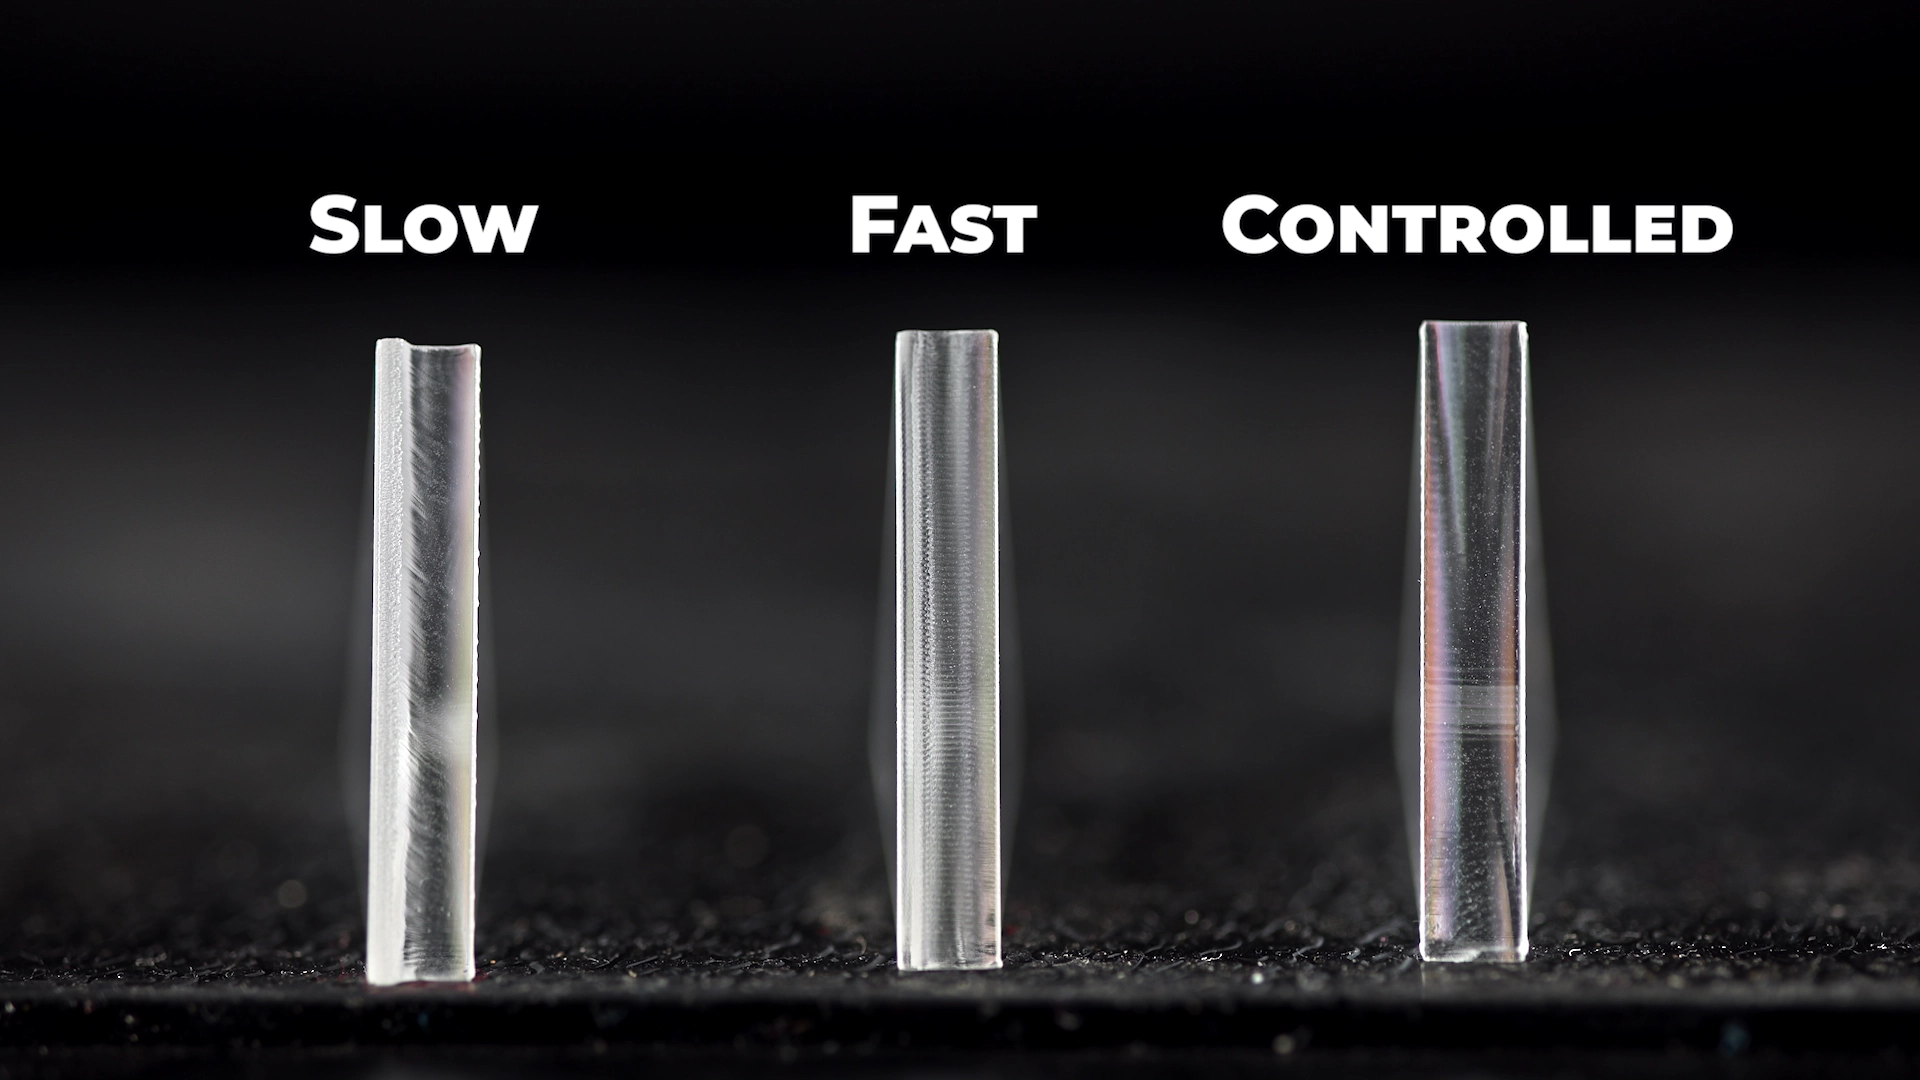
THINKING ACRYLIC CUTTING IS ABOUT SPEED ALONE
The Problem
Conflicting advice:
- “Cut fast”
- “Cut slow”
The Reality
Acrylic cutting is about heat control, not speed alone.
What Happens
Too slow:
- overheating
- rounded edges
- cloudy finish
Too fast:
- incomplete cuts
- rough edges
The Fix
- Use sufficient power
- Use controlled speed
- Aim for one clean pass
KEY INSIGHT
The goal is not speed — the goal is controlled heat.
MISTAKE 3:
USING THE WRONG POWER FOR THE MATERIAL THICKNESS
The Problem
Incorrect power relative to thickness.
What Happens
Too slow:
- overheating
- rounded edges
- cloudy finish
Too fast:
- incomplete cuts
- rough edges
The Fix
- Use enough power for a clean pass
- Avoid compensating with speed
KEY INSIGHT
Power and speed must work together — not independently.
MISTAKE 4:
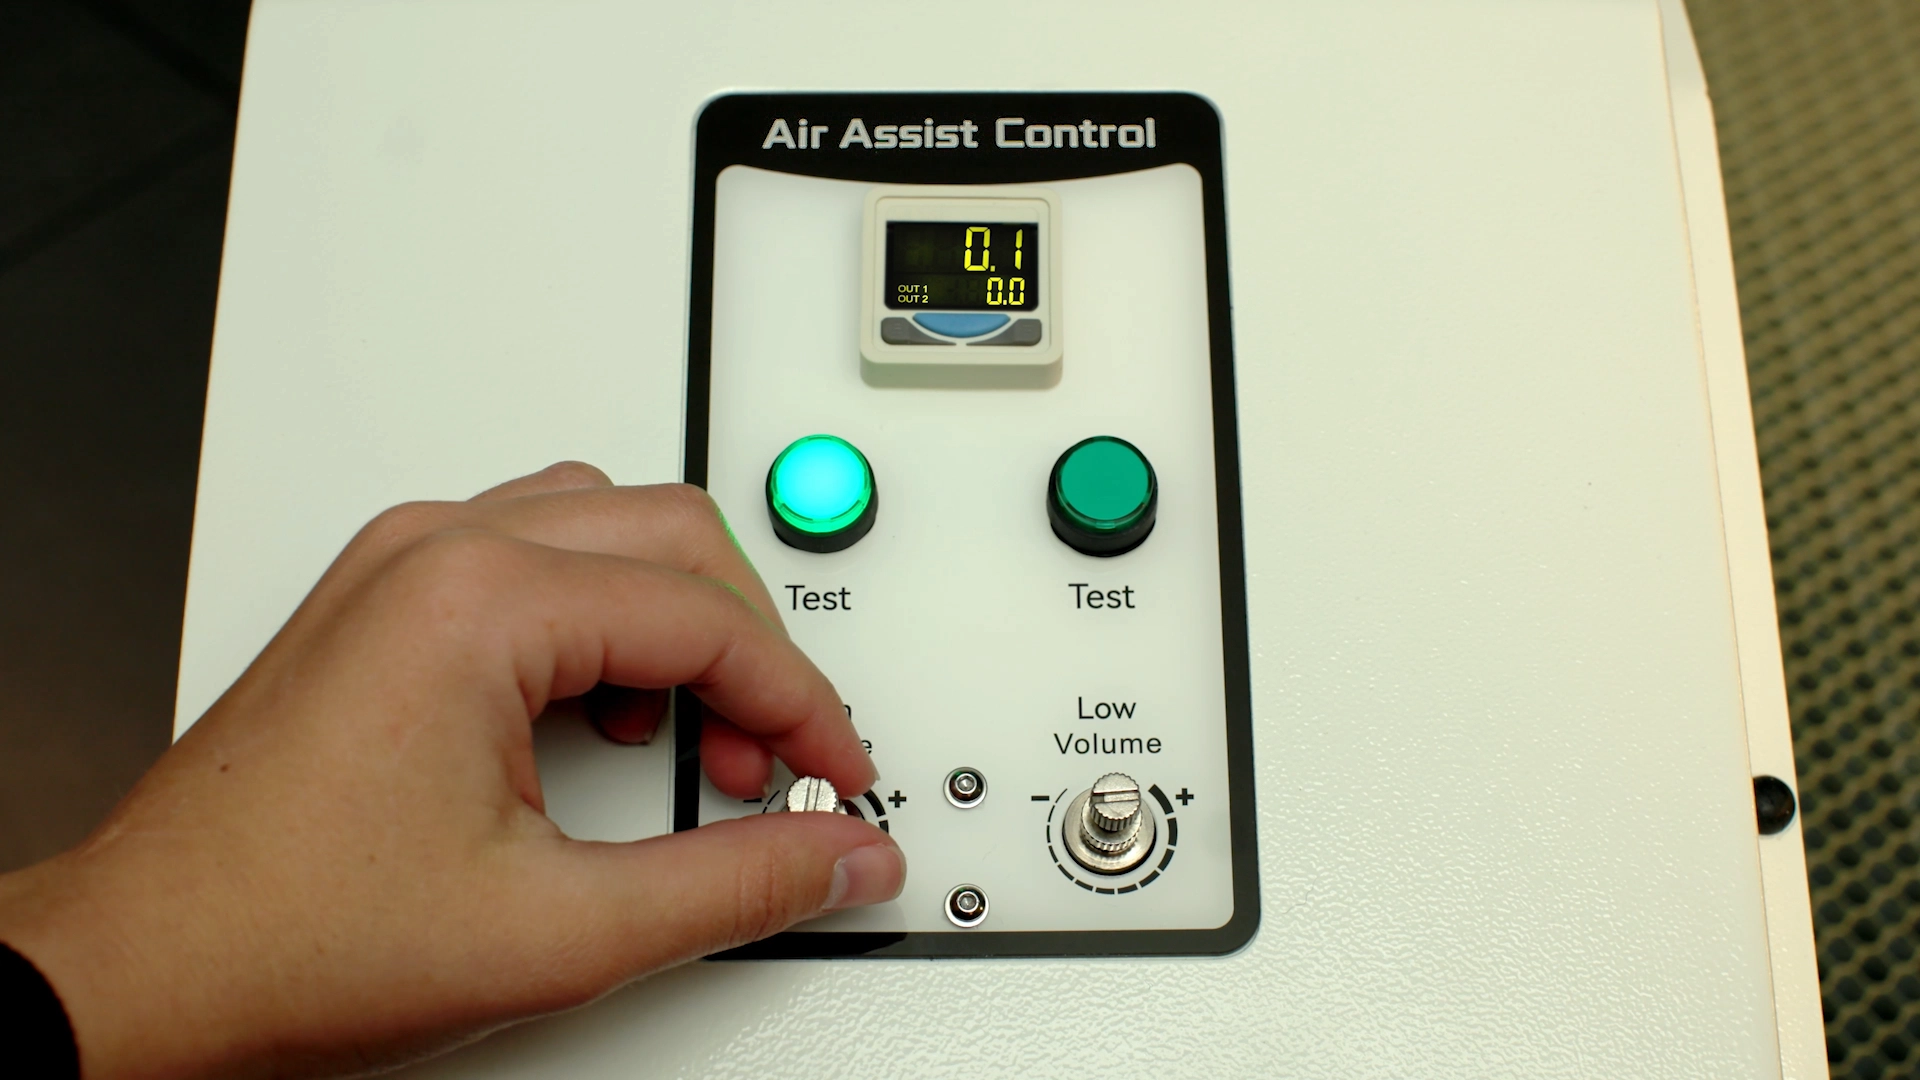
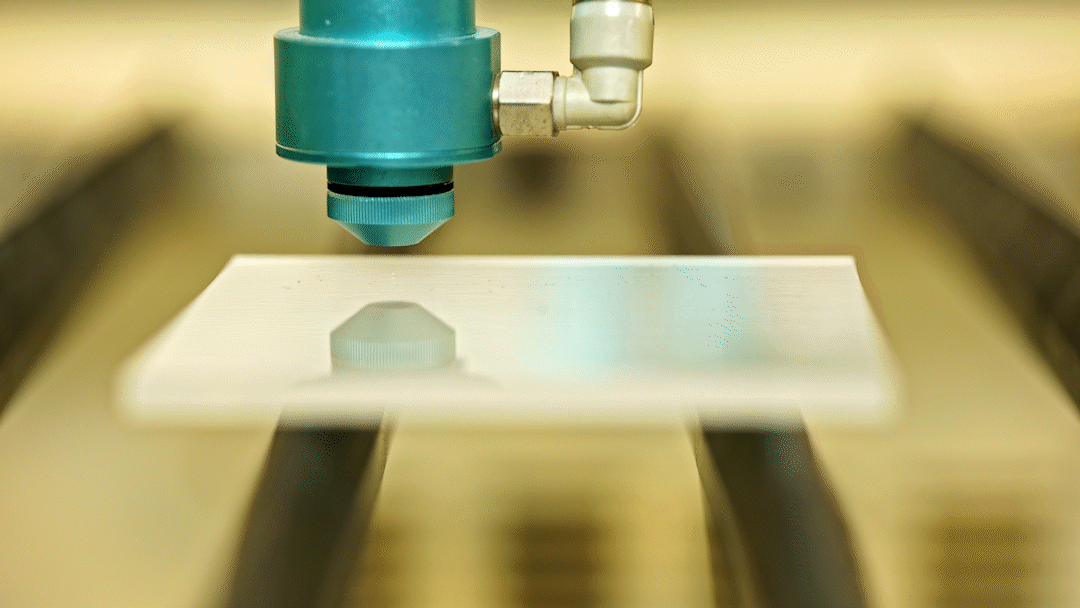
INCORRECT AIR ASSIST SETUP (TOO MUCH OR POORLY DIRECTED AIRFLOW)
The Problem
Too much airflow or airflow hitting the cut line aggressively.
What Happens
- disturbs molten acrylic
- interrupts reflow
- causes:
- smudged edges
- cloudy finish
- reduced clarity
Why This Happens
Acrylic needs smooth melting and cooling.
Too much air:
- cools unevenly
- disrupts edge formation
The Fix
- reduce airflow pressure
- avoid direct nozzle blasting
- adjust airflow direction
Best Practice
- use low to moderate airflow
- test per material
KEY INSIGHT
Unlike MDF, where strong airflow improves cutting, acrylic performs best with controlled airflow.
MISTAKE 5:
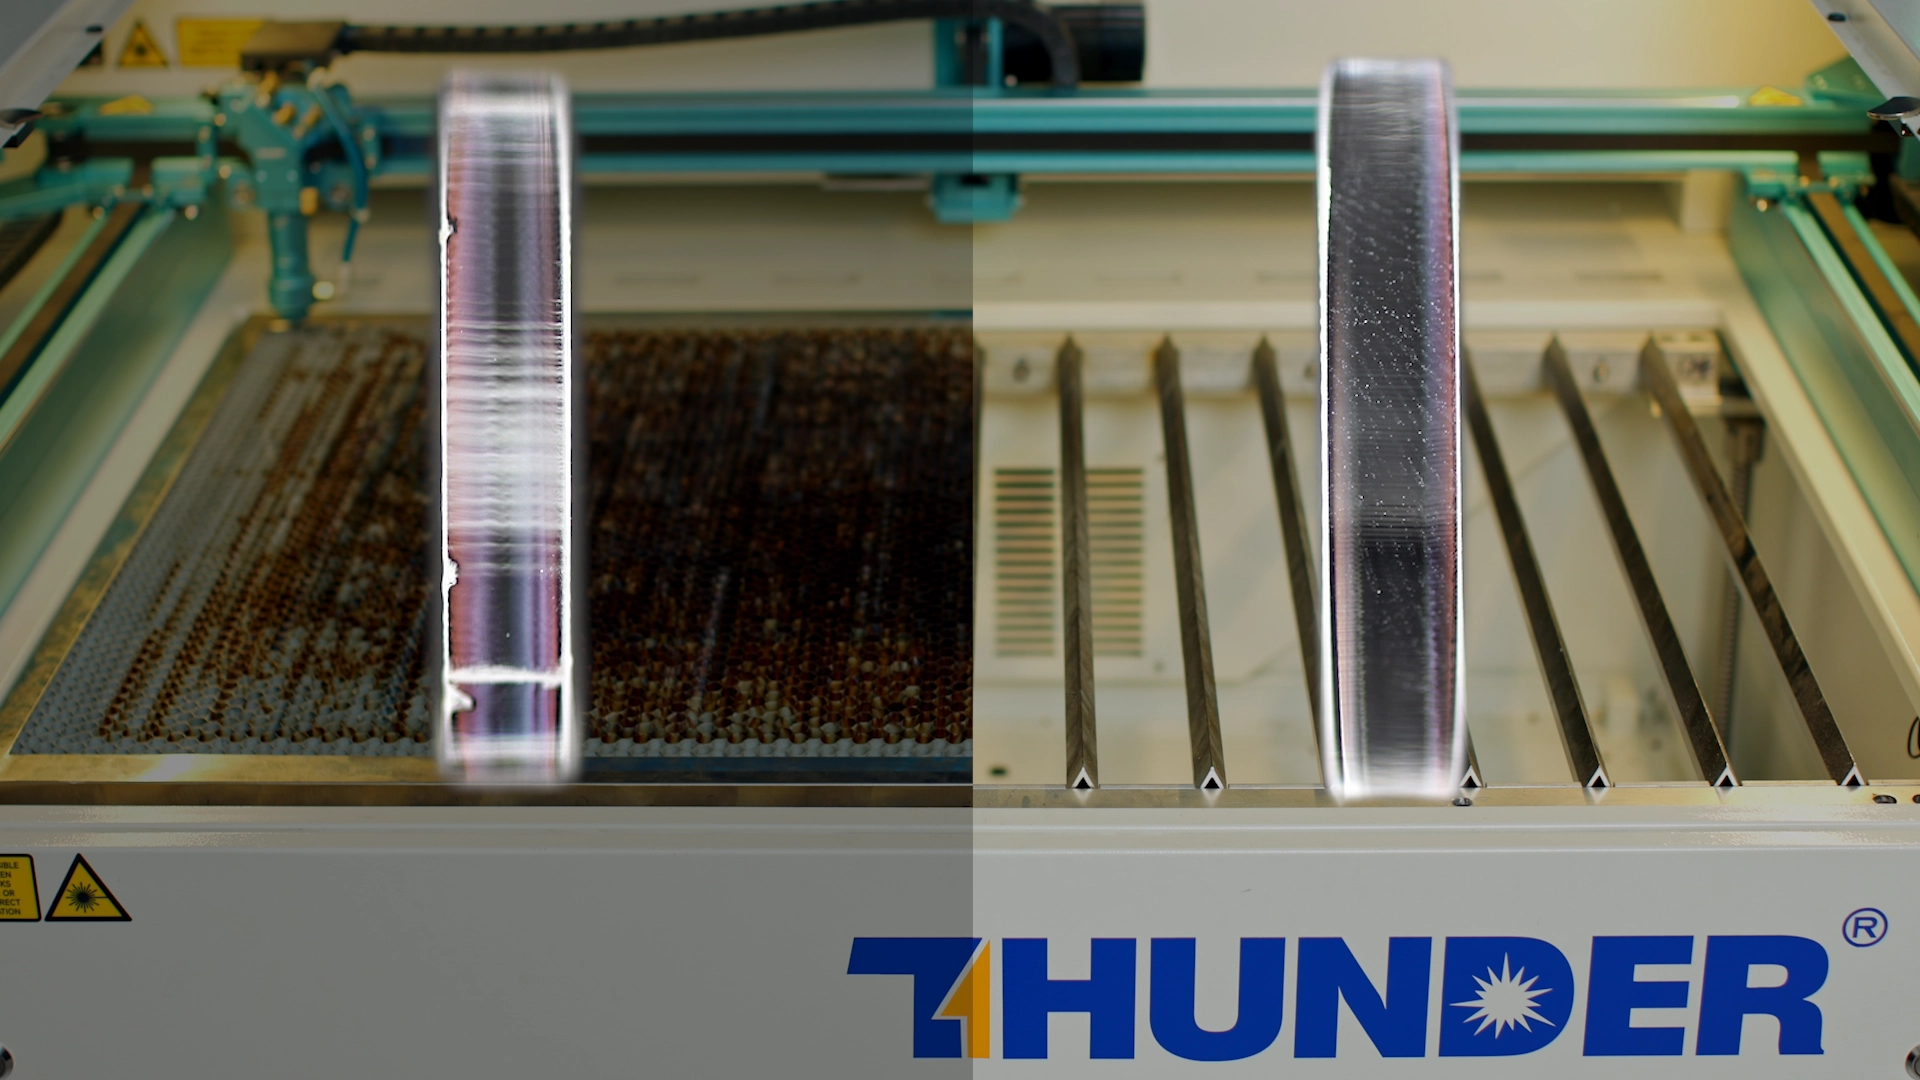
CUTTING ACRYLIC ON A HONEYCOMB TABLE (REFLECTIONS & MARKS)
The Problem
Cutting directly on honeycomb.
What Happens
- beam reflects
- underside marks
- quality drops
The Fix
- use blade table
- elevate acrylic
KEY INSIGHT
The underside of your cut is just as important as the top — reflections can ruin an otherwise perfect job.
MISTAKE 6:
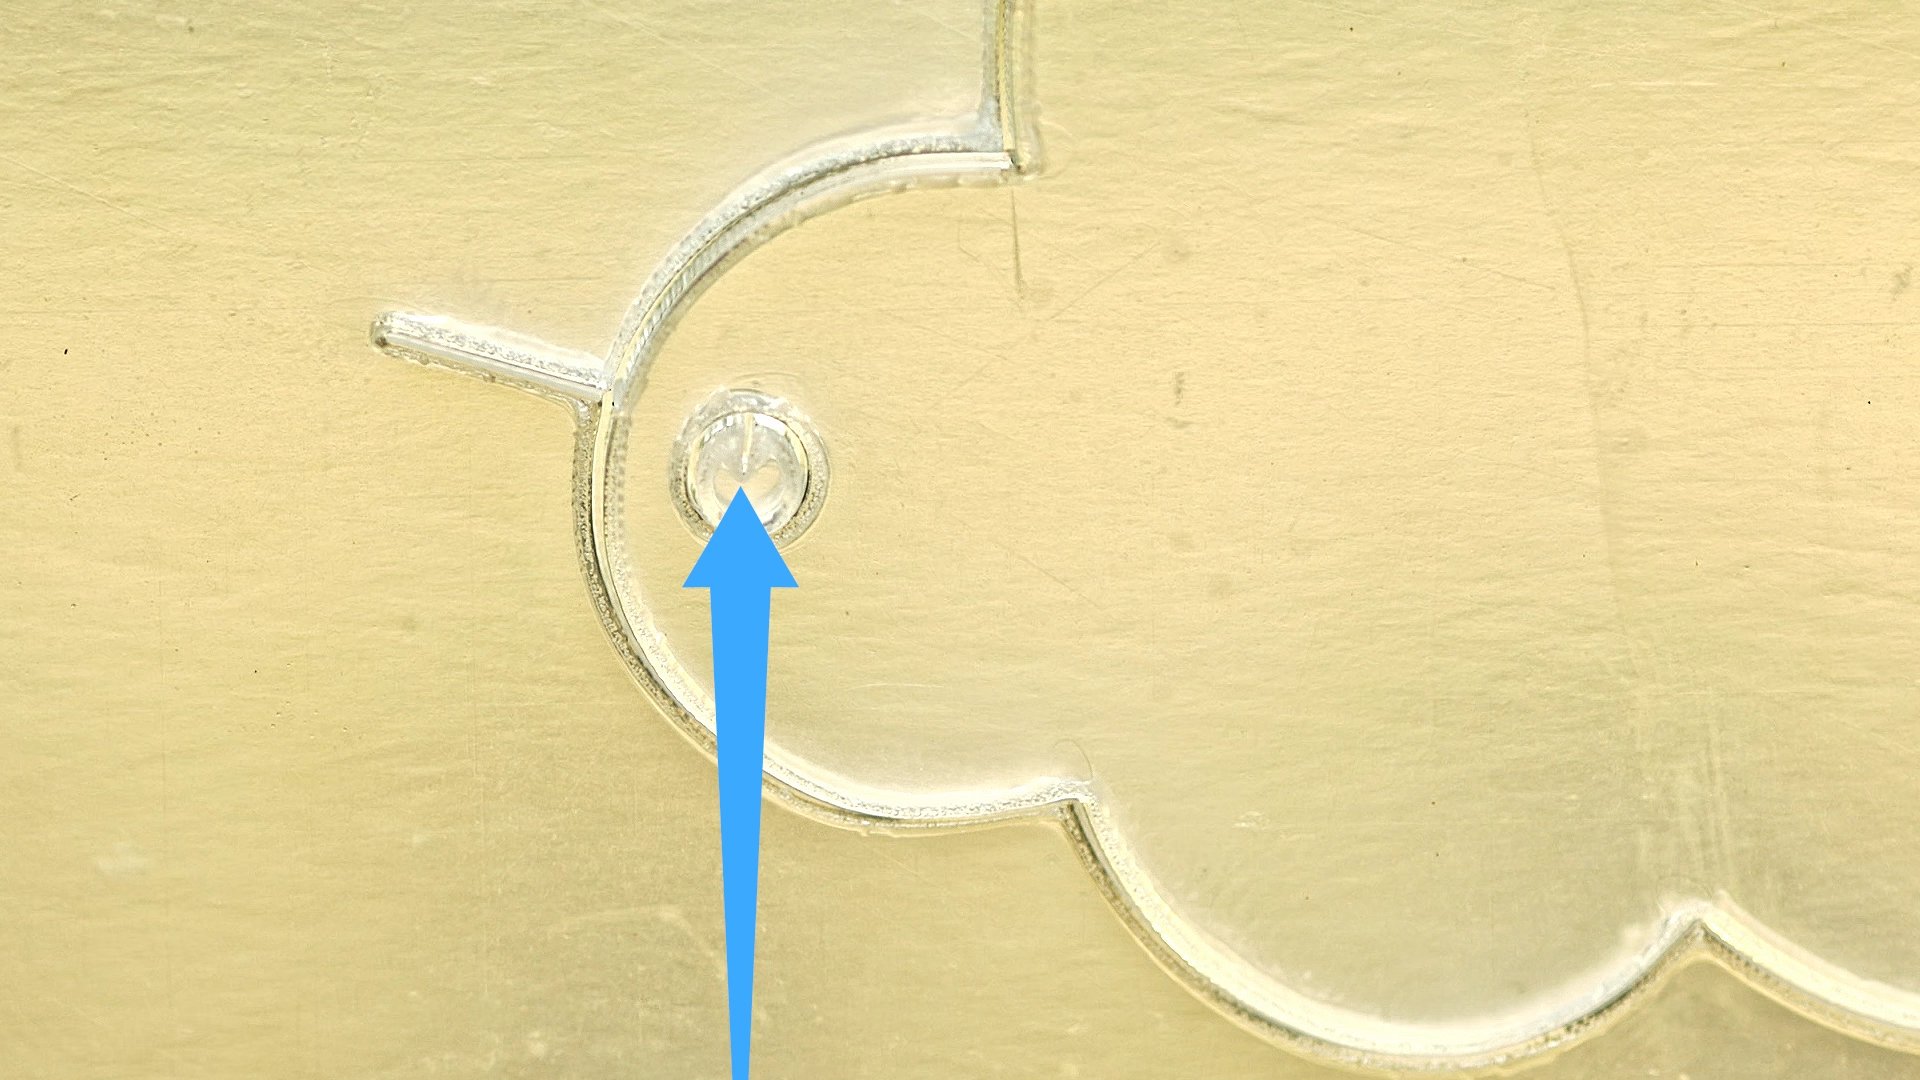
INCORRECT CUT DIRECTION (VISIBLE START MARKS)
The Problem
Ignoring start points and cut order.
What Happens
- visible entry marks
- uneven start points
The Fix
- cut inside → outside
- optimise path
- control start position
KEY INSIGHT
The way your laser starts a cut can be more visible than the cut itself.
MISTAKE 7:
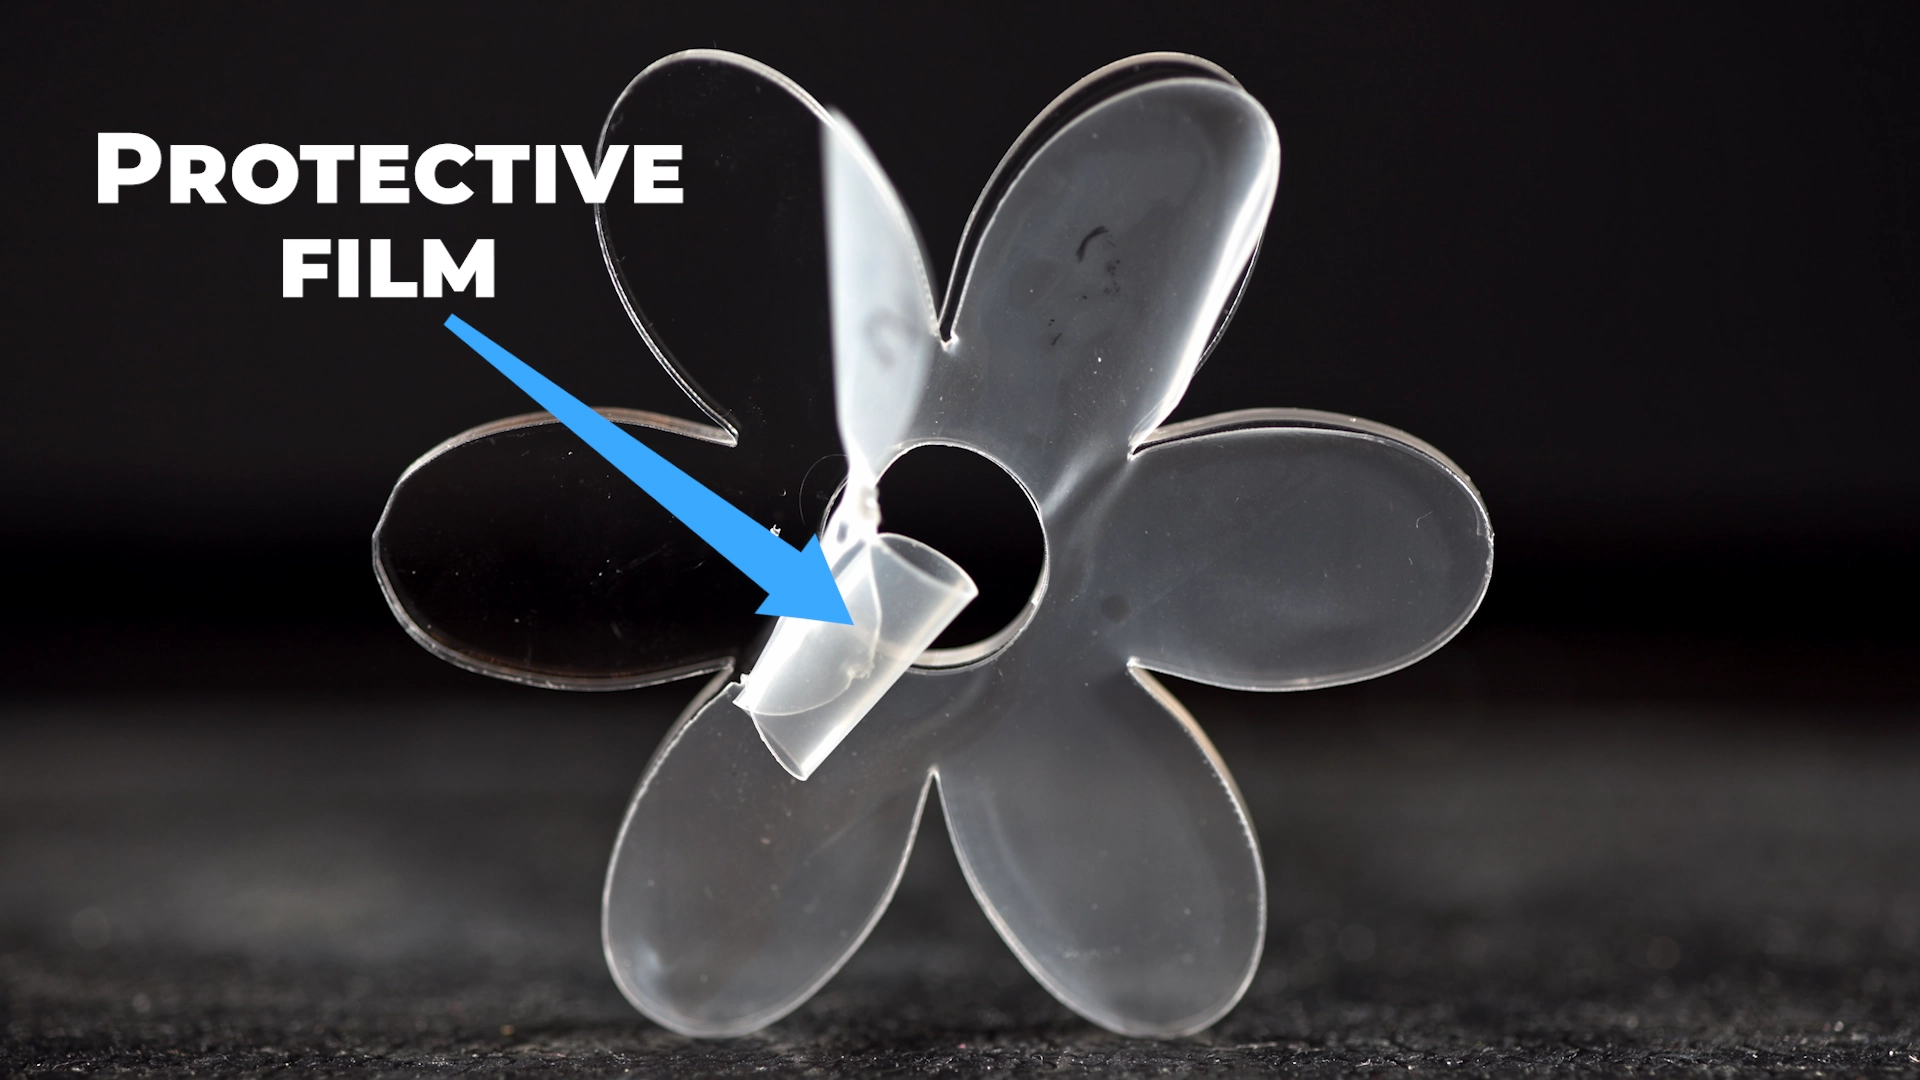
REMOVING PROTECTIVE FILM TOO EARLY
The Problem
Cutting without film.
What Happens
- smoke marks
- scratches
The Fix
- Protective film is not packaging — it’s part of your process.
KEY INSIGHT
The way your laser starts a cut can be more visible than the cut itself.
MISTAKE 8:
INCORRECT FOCUS HEIGHT
The Problem
Out-of-focus beam.
What Happens
- wider kerf
- poor edge
The Fix
- Always check focus.
MISTAKE 9:
CUTTING IN MULTIPLE PASSES
The Problem
Multiple passes.
What Happens
- re-melting
- loss of polish
The Fix
Use one clean pass.
MISTAKE 10:
NOT TESTING BEFORE PRODUCTION
The Problem
Skipping test cuts.
The Fix
Always test.
MISTAKE 12:
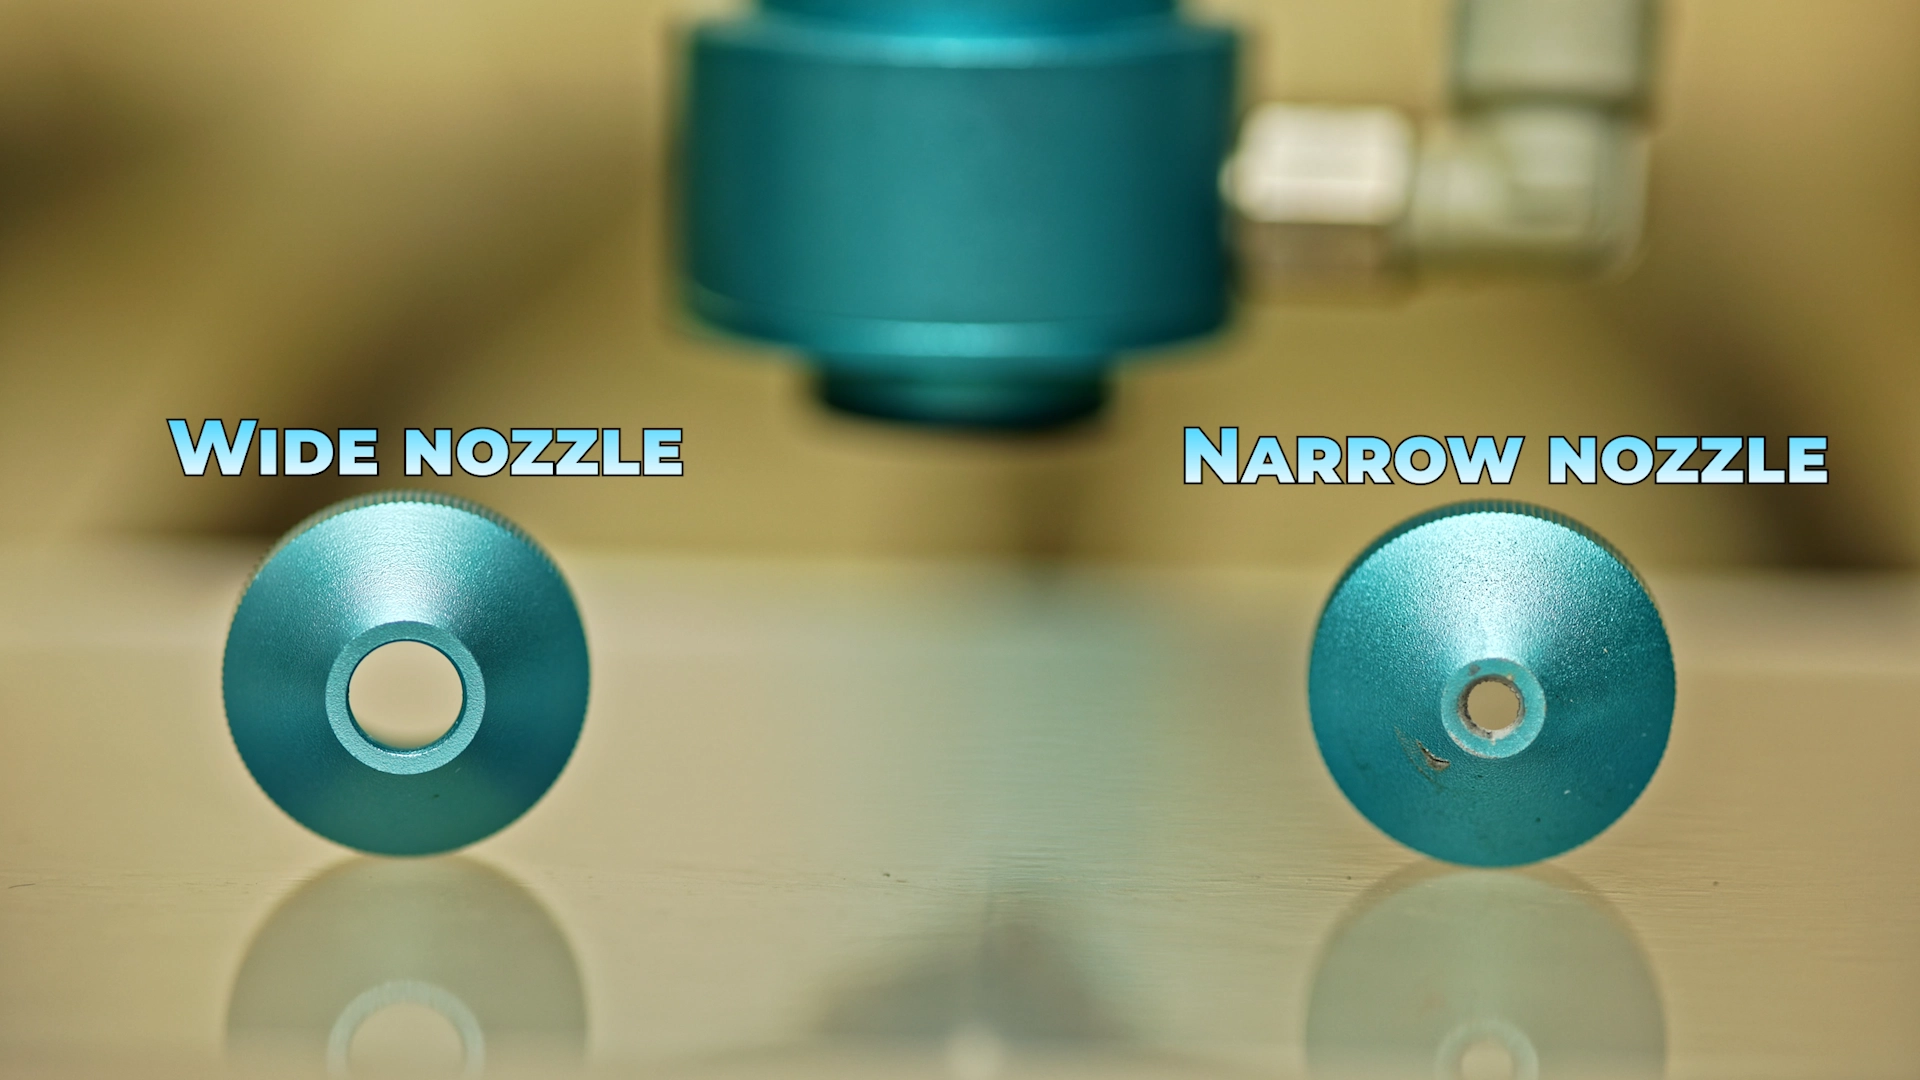
IGNORING NOZZLE DESIGN (WIDE VS NARROW AIRFLOW)
The Problem
Not understanding nozzle behaviour.
What Happens
Narrow nozzle:
- strong airflow
- smudging
Wide nozzle:
- softer airflow
- cleaner edges
The Fix
- reduce airflow
- avoid aggressive nozzle pressure
KEY INSIGHT
Nozzle design controls airflow — and airflow controls edge quality.
Advanced Acrylic Cutting Tips Most Beginners Don’t Know
- Controlled slower cutting improves finish
- High power enables clean pass
- Film ON for cutting, OFF for engraving
- Heat control is everything
How to Get Consistent, Professional Results
- Use cast acrylic
- Balance power & speed
- Control airflow
- Maintain focus
- Test materials
Final Thoughts
Most acrylic cutting problems are not machine problems — they are setup problems.