Laser Engraving Wood: Expert Guide for Clean & Consistent Results

Why Wood Engraving Is More Complex Than It Looks

Most wood engraving problems come from poor heat control, not bad settings.

Laser engraving wood looks simple — load a design, press start, and expect a clean result.

In reality, most users experience:

• Inconsistent engraving contrast
• Burnt or dirty edges
• Random streaking across the job
Loss of detail, especially in fine work

What makes this frustrating is that these problems often appear even when everything seems correct.

The reason is simple:

Laser engraving wood is not marking — it is controlled burning.

Once you understand that engraving is a heat-driven process influenced by multiple variables at the same time, the mindset changes completely.

You stop asking:
👉 “What settings should I use?”

And start asking:
👉 “What is affecting the burn, and how do I control it?”
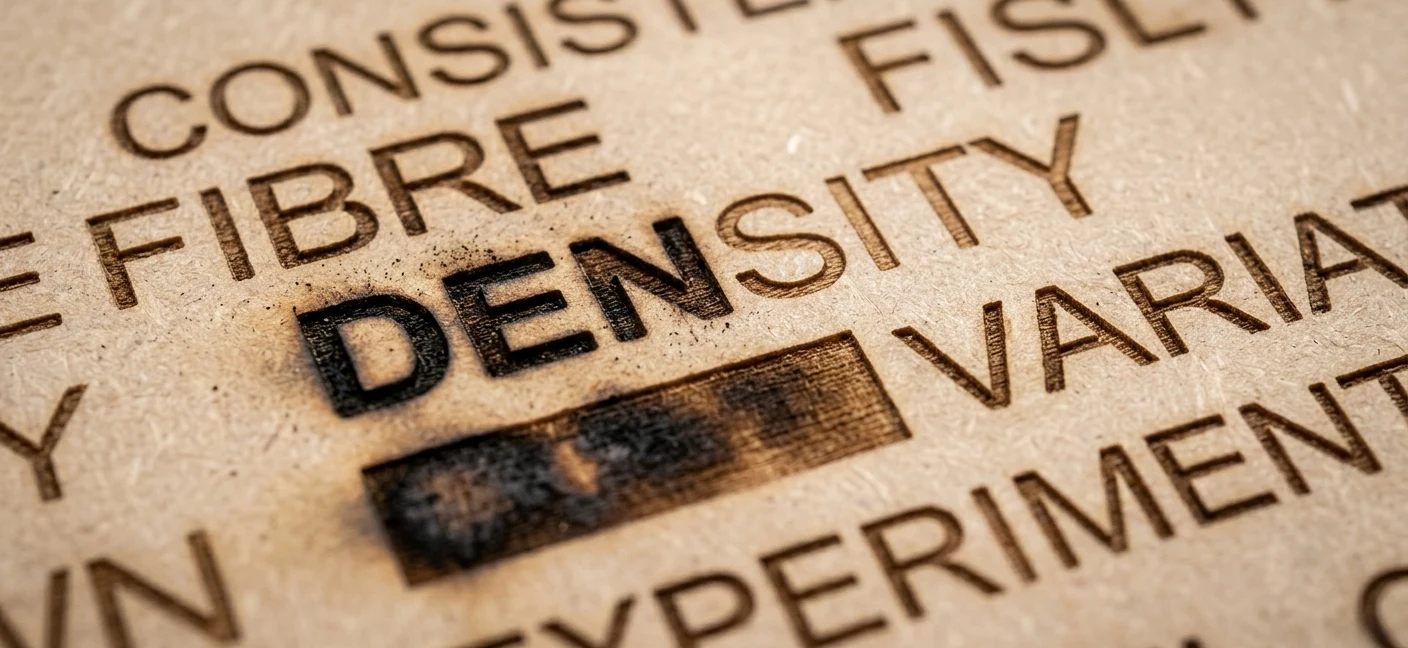
Choosing the Right Wood

Macro close-up of laser engraved MDF showing burn variation, soot buildup, fibre texture, and inconsistent engraving behaviour across the surface.

Before adjusting any machine setting, you need to understand that the material is not passive. It actively determines how the engraving will behave.

Wood — especially MDF — is not uniform. Even when two boards look identical, they can respond very differently under the laser.

This is because the engraving process depends on:

  • Fibre density
  • Glue distribution
  • Surface finish

The laser is not engraving a consistent surface — it is reacting to these internal differences.

Understanding MDF at a Practical Level

MDF is made from compressed wood fibres and resin (glue). These materials do not burn in the same way.

  • Wood fibres carbonise naturally and predictably
  • Glue reacts inconsistently and can change tone and burn rate

This creates variation across the sheet, even within the same panel.

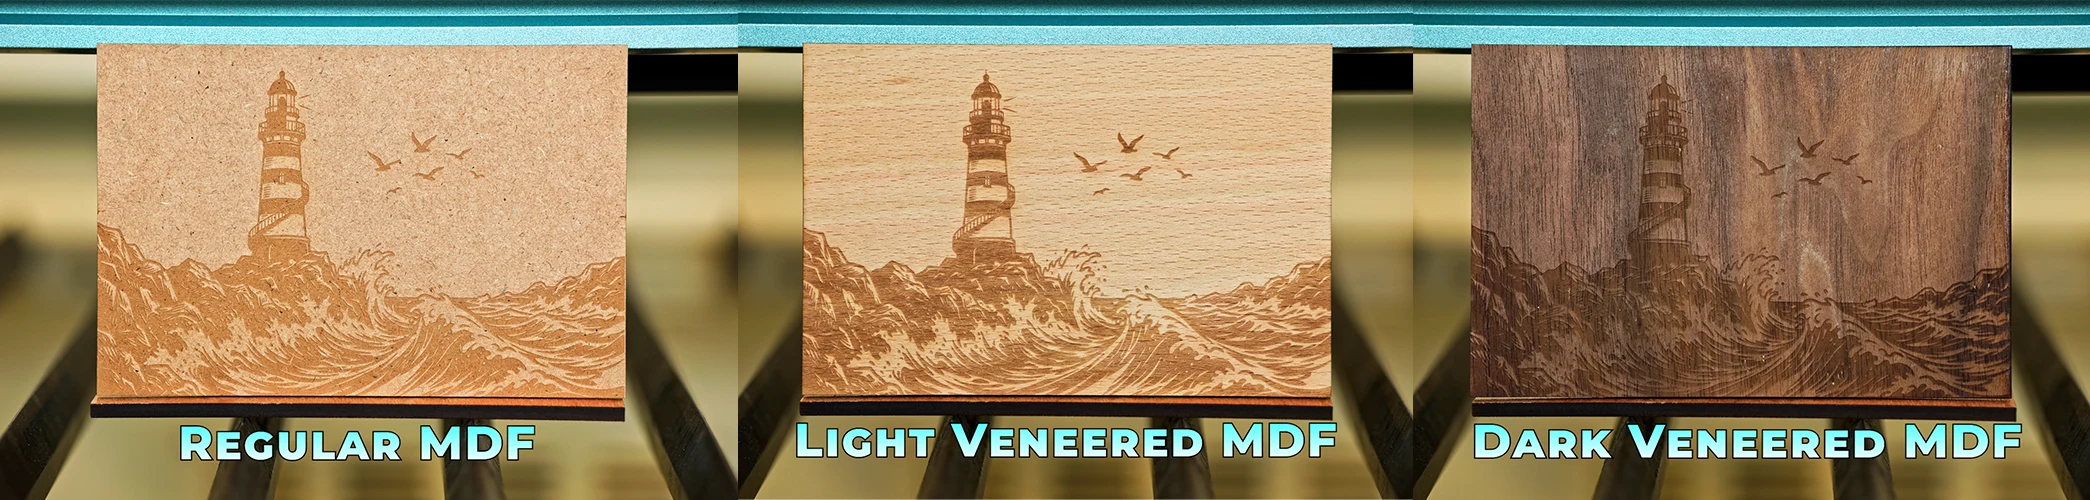
Light vs Dark MDF — What You’re Actually Seeing

Light MDF generally engraves cleaner because it produces less soot and burns more evenly. The trade-off is that the engraving appears lighter and has less visual contrast.

Dark MDF behaves differently. It carbonises more aggressively, producing stronger contrast and deeper visual impact. However, this also introduces more soot and increases the likelihood of surface contamination.

Comparison of laser engraving results on regular MDF, light veneered MDF, and dark veneered MDF, showing differences in engraving contrast, wood grain visibility, burn depth, and surface finish.

Surface Finish and Glue Content

A smooth surface allows the laser to burn evenly, producing cleaner engraving. A rough or porous surface traps smoke and residue, leading to inconsistent results.

Glue content is often the hidden variable. When glue distribution varies:

  • Burn behaviour changes
  • Contrast becomes inconsistent
  • Engraving can appear patchy

MDF Selection Takeaways

👉 Choose material based on your desired result:

  • Clean, minimal finish → lighter MDF
  • Strong contrast → darker MDF
  • Consistency across jobs → veneered MDF

👉 If engraving suddenly changes:

  • Check the material before changing your settings

If MDF is the material you use most often, the next step is to understand the full production workflow. Our Laser Cutting MDF masterclass covers board choice, airflow, focus, cut order, and machine setup so you can produce cleaner and more consistent results.

Learn More about MDF

See Machines That Handle MDF Better

Choose a machine that gives you cleaner contrast and more consistent results on the MDF you use most.

What Can You Make with Laser Engraved Wood?

  • Wooden keyrings
  • Product tags
  • Home décor
  • Custom plaques
  • Branded promotional products
  • Business signage
  • Wedding décor
  • Personalised gifts

Many laser engraving businesses start with a single product idea and grow into full-time production businesses.

The combination of customisation, low material costs, and fast turnaround makes wood engraving attractive for side hustles and small manufacturing businesses.

Laser Power and Speed

Power and speed are not just machine settings. They are tools used to control how heat is applied to the material.

When the laser moves across the wood:

  • It delivers energy
  • That energy becomes heat
  • That heat creates the burn

Your engraving result is simply the visible effect of that controlled burn.

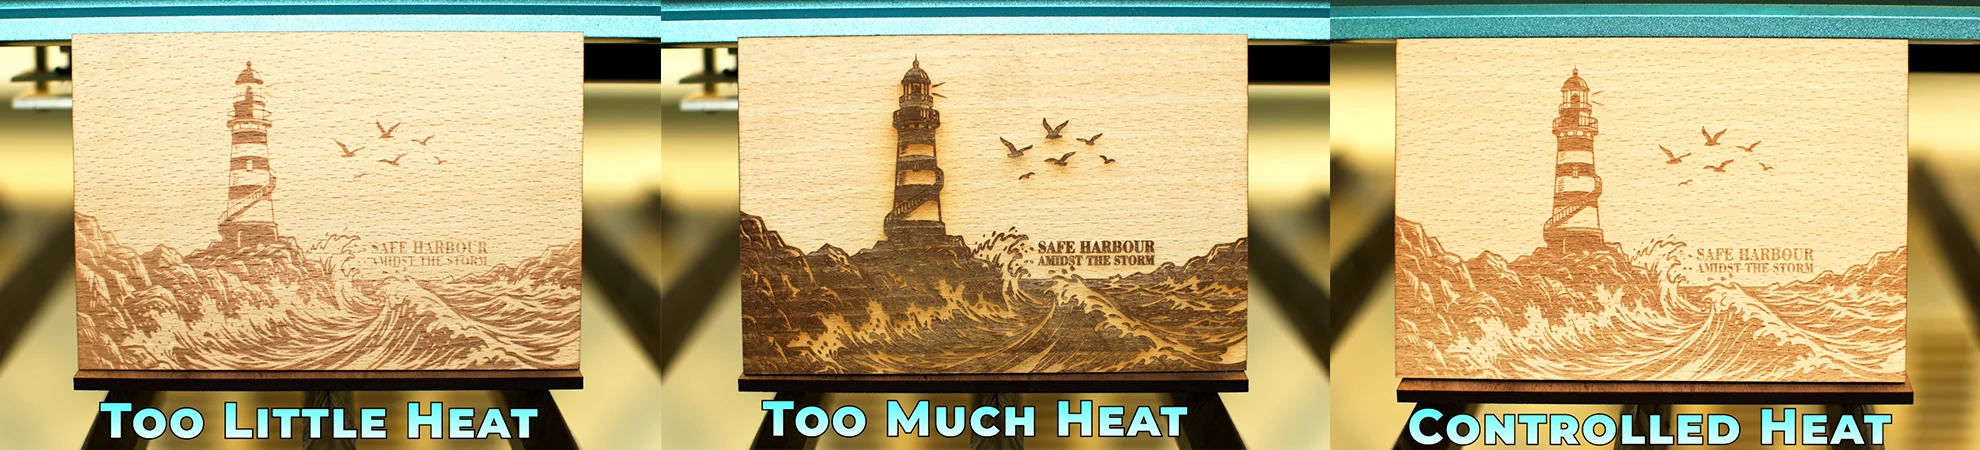
What Happens When Heat Is Mismanaged

Comparison of laser engraving results on veneered MDF showing the effects of too little heat, too much heat, and controlled heat on engraving contrast, burn depth, detail clarity, and edge quality.

Too much heat causes the burn to spread beyond the intended area. Edges soften, detail is lost, and the engraving can appear overdone.

Too little heat results in a shallow burn. The engraving lacks contrast and may appear faint or incomplete.

Power and Speed Takeaways

👉Instead of increasing power immediately:

  • Reduce speed slightly to improve control

👉 Think in terms of:

  • Check the material before changing your settings

DEEP VS SHALLOW ENGRAVING

Engraving depth is not accidental. It is a decision that affects both appearance and quality.

Deep engraving applies more heat, producing darker tones and visible depth. It is effective for bold designs and signage, but as depth increases, control decreases. Heat spreads more easily, and fine detail begins to degrade.

Shallow engraving applies less heat. The result is cleaner, sharper, and more refined. This is often preferred for detailed work and premium products where finish quality matters more than depth.

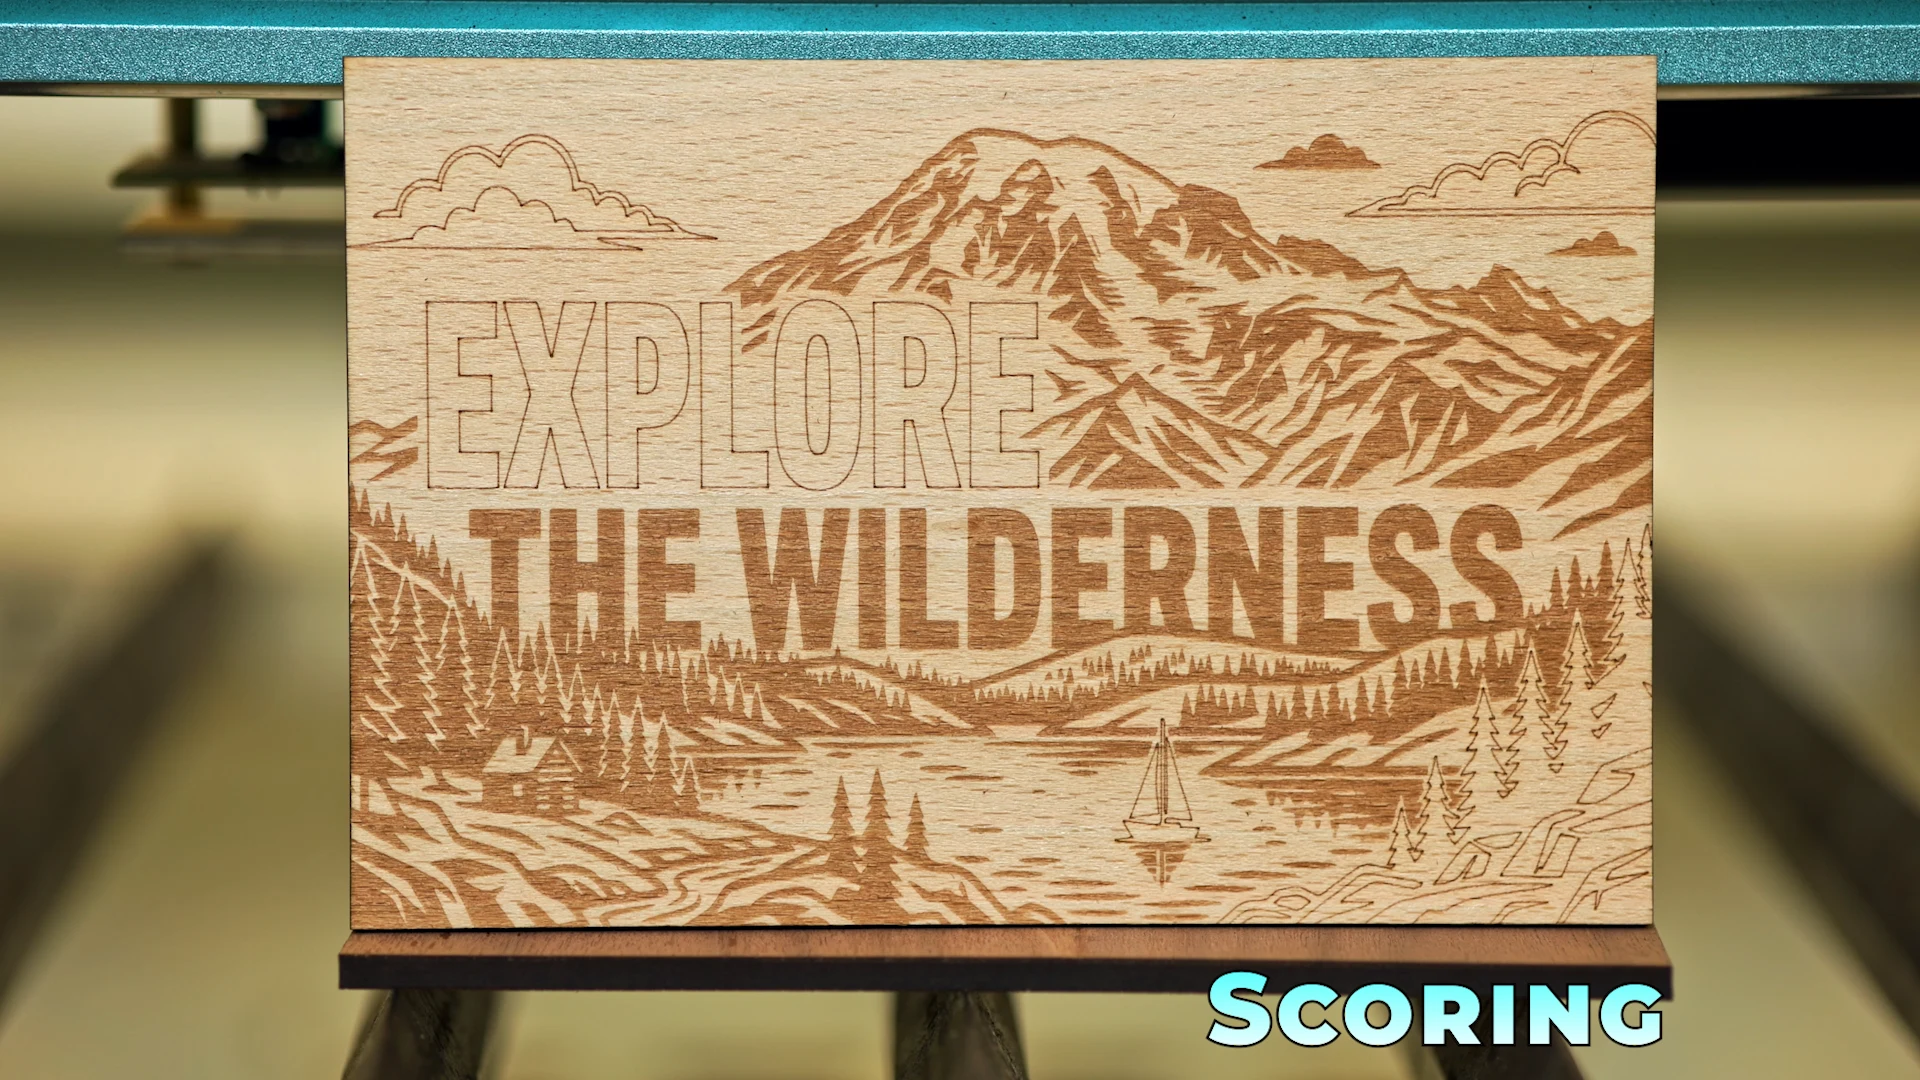
SCORING (VECTOR ENGRAVING) — Precision Without Fill

Scoring is a different approach to engraving. Instead of filling an area, the laser follows a path to create a line.

Because the laser does not repeatedly pass over the same area, heat buildup is minimal. This produces clean, sharp lines with very little distortion.

Practical Uses

  • Outlines and borders
  • Fine line artwork
  • Minimalist designs
  • Fast marking operations
Laser scored wood engraving on veneered MDF showing clean fine lines, minimal burn buildup, sharp detail, and precise vector engraving without filled areas.

KEY INSIGHT

Scoring is not about depth — it is about precision and efficiency

Scoring for Layering, Placement & Artistic Effects

Scoring becomes significantly more powerful when used as a structural and creative tool.

It can be used to define placement. For example, scoring the outline of letters into wood allows you to position and glue components with perfect alignment. This removes guesswork and speeds up production.

It can also be used creatively. By combining scored lines with controlled airflow, it is possible to influence how the edges burn. This can create subtle textures and shading effects without fully engraving an area.

Practical Takeaways

👉 Use scoring for:

  • Positioning and alignment
  • Layered signage
  • Artistic textures

👉 Use caution:

  • Best for creative work
  • Not ideal for precision branding

KEY INSIGHT

Scoring is not about depth — it is about precision and efficiency

Practical Takeaways

👉 Use deep engraving for:

  • Bold signage
  • Large, high-visibility designs

👉 Use shallow engraving for:

  • Fine text
  • Detailed artwork
  • Premium finishes

👉 Always remember:

  • More depth = more heat = less control
  • Less depth = less heat = more precision
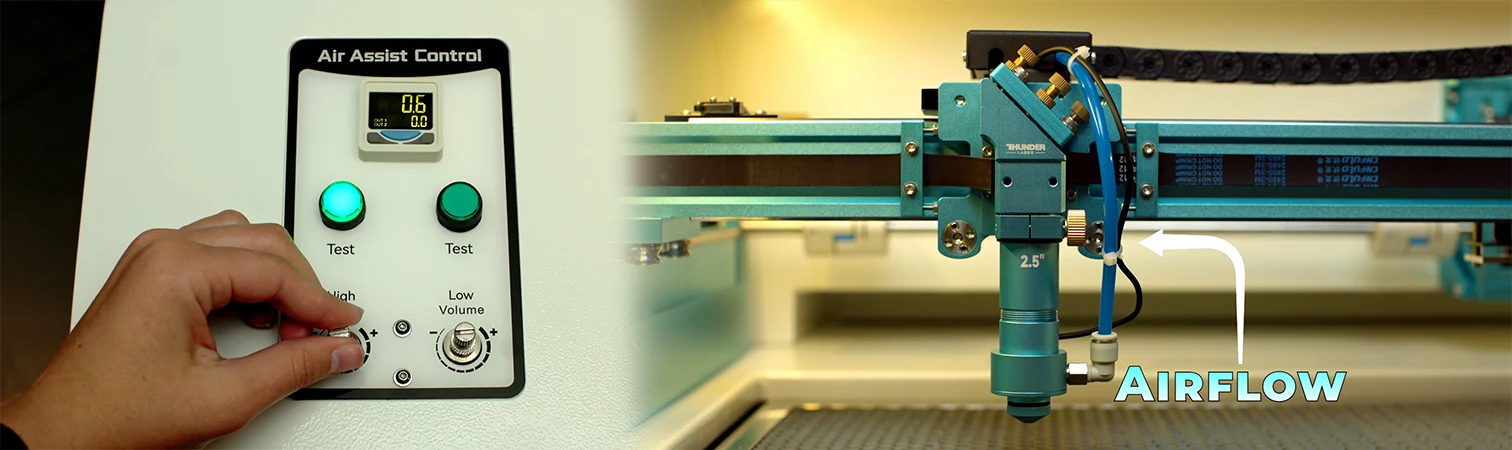
Digital air assist control system on a CO2 laser engraver showing adjustable airflow settings used to improve engraving consistency, reduce soot buildup, and maintain clean laser engraving results on wood.

Air Assist for Laser Wood Engraving

Air assist does more than remove smoke. It controls the environment in which engraving takes place.

When wood burns, it produces smoke and fine particles. These particles rise directly into the path of the laser beam. If not removed, they interfere with the beam and affect engraving consistency.

Understanding Digital Airflow

On machines like the Thunder Laser Nova Plus, airflow is digitally adjustable.

The values shown (such as 0.1 or 0.4) represent relative airflow levels within the machine — not fixed units of measurement.

  • Around 0.1 → almost no airflow
  • Around 0.3–0.4 → low, controlled airflow
  • Higher levels → strong airflow

What Happens in Practice

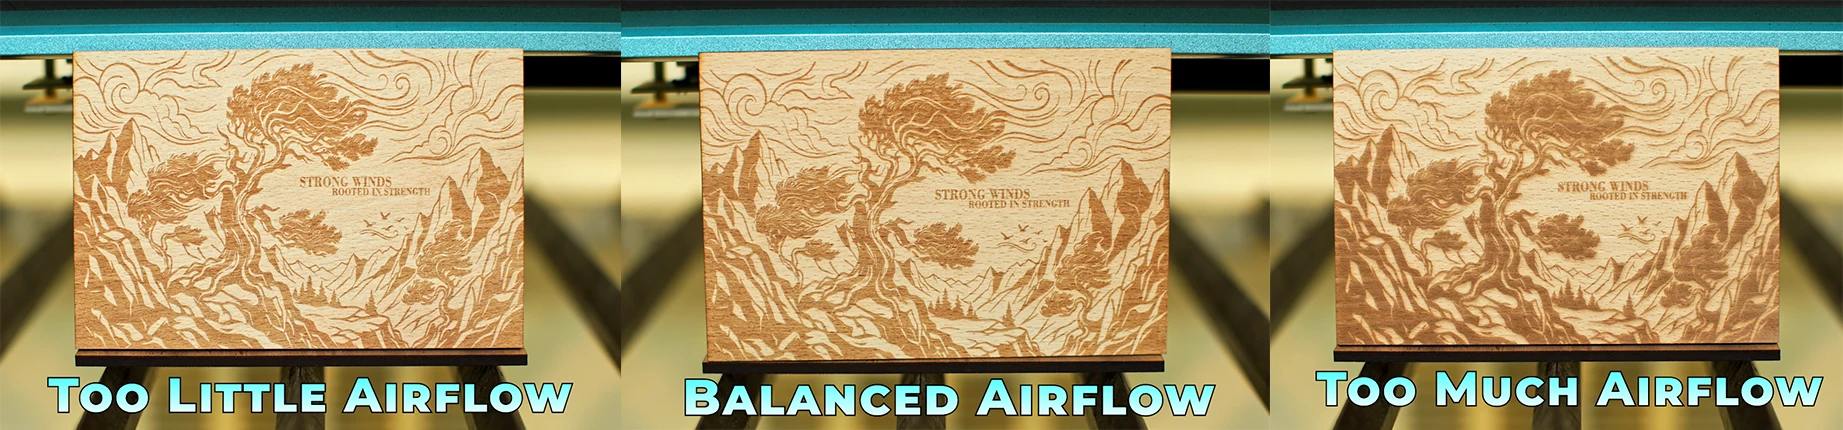
With very low airflow (around 0.1), smoke is not cleared effectively. Residue begins to build up on the nozzle, which obstructs the beam and causes inconsistent engraving.

With controlled low airflow (around 0.3–0.4), smoke is cleared without disrupting the burn. This keeps the beam path clean and maintains consistency, especially during long jobs.

With high airflow, the burn is disrupted. The surface is cooled too quickly, reducing contrast and introducing haze in detailed areas.

Comparison of airflow settings for laser engraving wood

Airflow Takeaways

👉 Ideal engraving airflow is low, not high

👉 Use airflow to:

  • Keep the beam path clean
  • Prevent buildup during long jobs
  • Maintain consistent engraving quality

👉 Avoid:

  • No airflow → causes streaking
  • Excess airflow → reduces contrast

Find The Right Machine For Cleaner Results

Good airflow matters, but the right machine makes control much easier.

View Recommended Machines
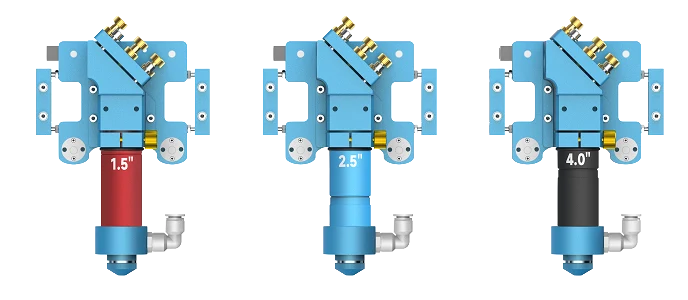
Comparison of 1.5-inch, 2.5-inch, and 4.0-inch laser engraving lenses showing different focal lengths used for precision engraving, general-purpose engraving, and thicker material processing.

LENS CHOICE — Changing How the Beam Interacts with the Material

The lens determines how tightly the laser beam is focused. This directly affects engraving quality.

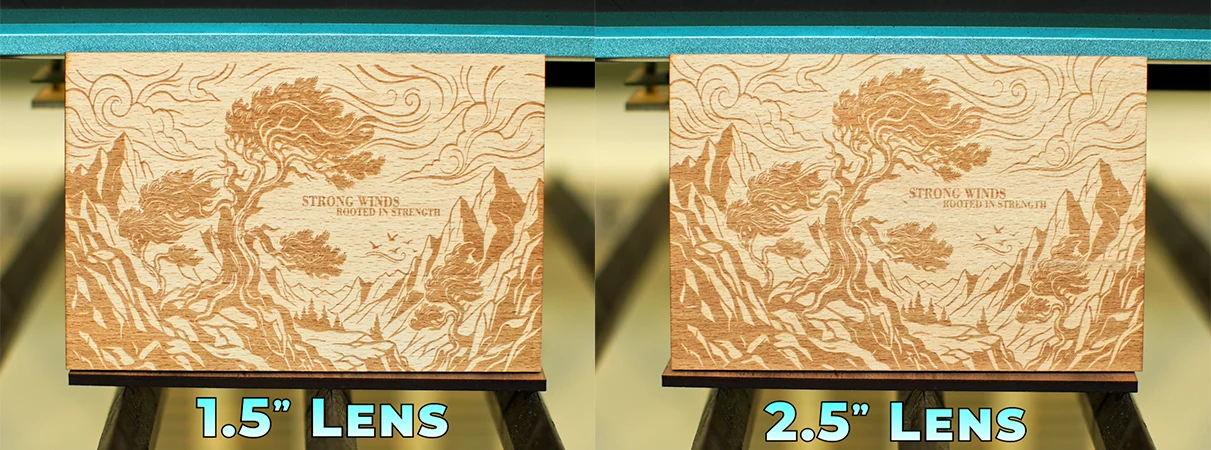
A shorter focal length concentrates the beam into a smaller point. This increases precision and produces sharper engraving.

A longer focal length spreads the beam slightly, reducing precision but increasing tolerance for uneven surfaces.

Lens Choice Takeaways

👉 Short focal length (e.g. 1.5”):

  • Sharper detail
  • Cleaner engraving

👉 Longer focal length (e.g. 2.5”):

  • More forgiving
  • Better for general use
Comparison of wood laser engraving results using a 1.5-inch lens and a 2.5-inch lens, showing differences in engraving sharpness, detail precision, and beam focus on veneered MDF.

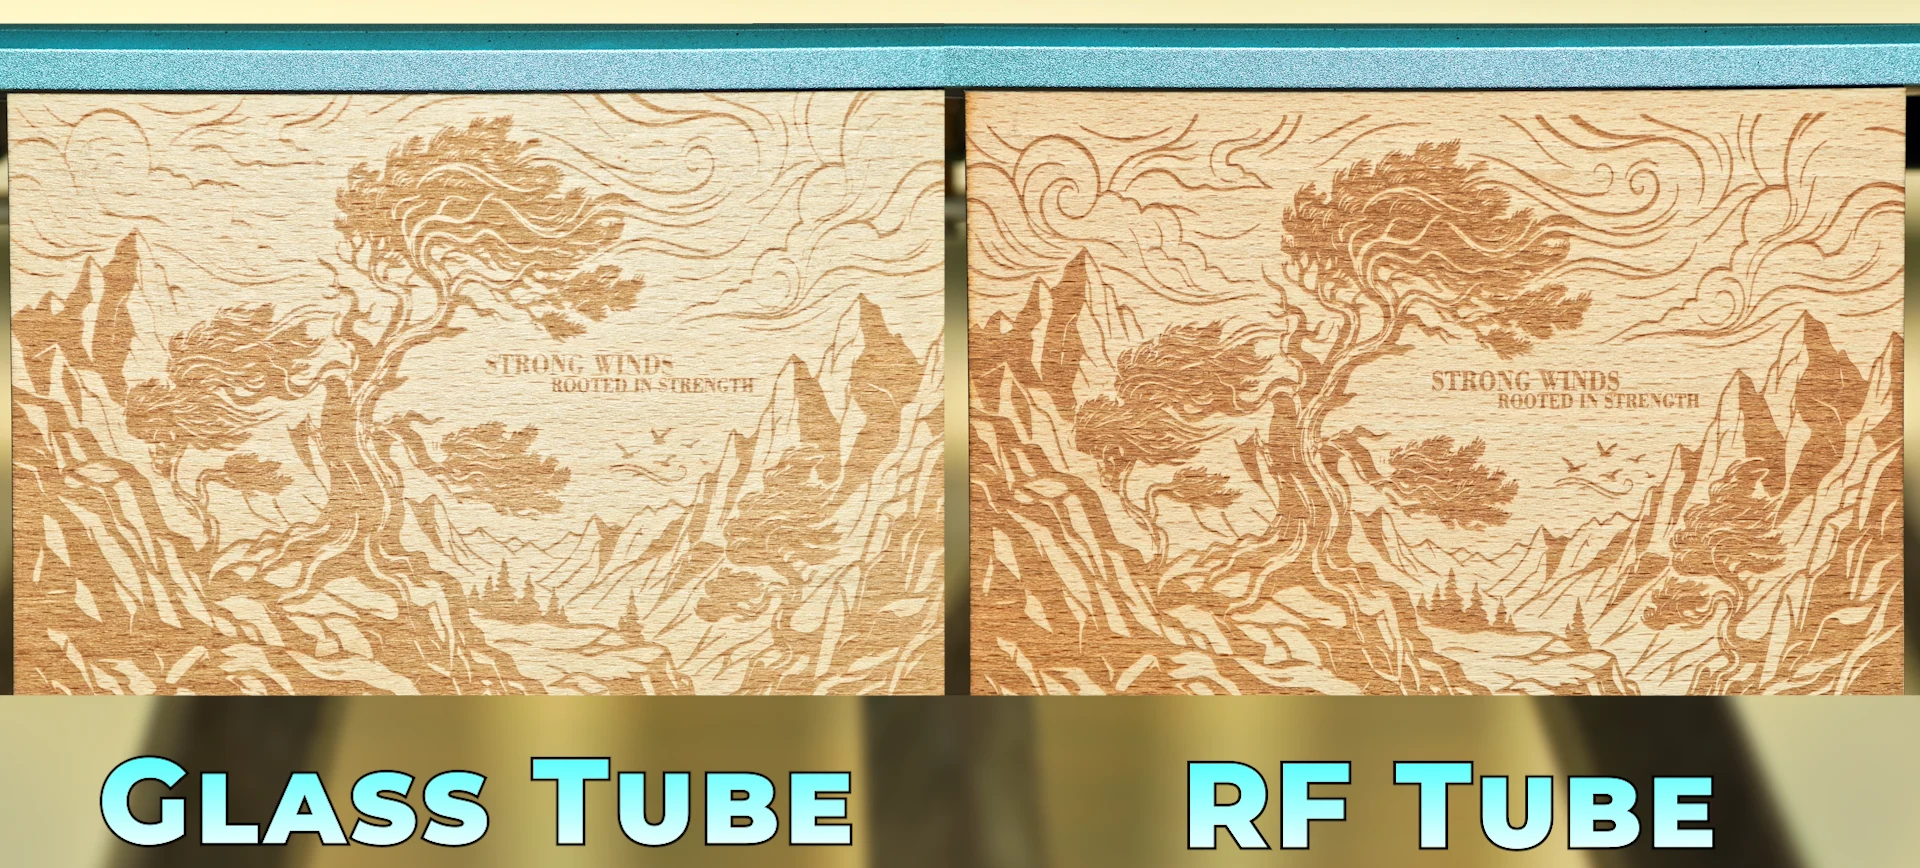
GLASS VS RF TUBES — Why Beam Quality Matters More Than Power

Laser tubes differ in how they deliver energy.

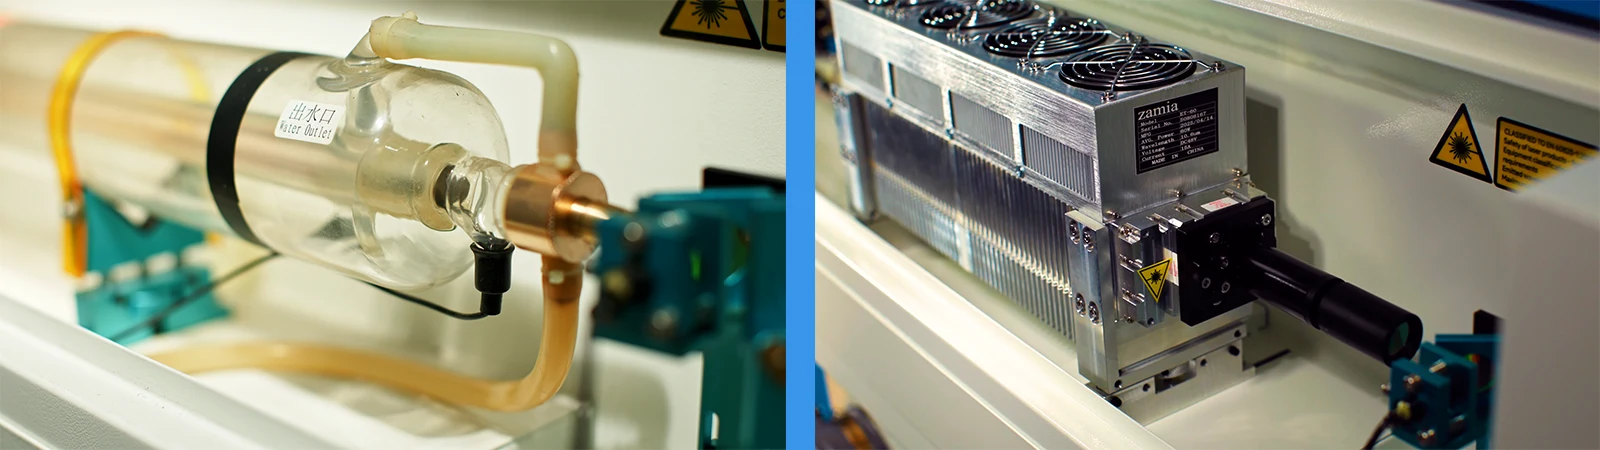
Glass tubes produce a larger, less controlled beam. RF tubes produce a smaller, more precise beam with faster response.

Want a deeper understanding of how different laser tubes affect engraving quality, beam precision, maintenance, and overall performance? Read our detailed guide on the difference between glass and metal CO2 laser tubes to learn why beam quality often matters more than raw power when engraving wood and other materials.

What This Means for Engraving

A larger beam spreads heat more easily, which reduces detail and softens edges.

A tighter beam delivers energy more precisely, preserving detail and improving overall quality.

RF laser tube vs glass tube engraving quality on wood.

KEY INSIGHT

Beam quality affects engraving precision more than raw power.

Understanding Line Interval

Line interval determines how the engraving is constructed line by line.

When engraving a filled area, the laser moves in passes. The spacing between these passes is the line interval.

What Happens Physically

A small interval (e.g. 0.03 in LightBurn):

  • Lines overlap more
  • More heat is applied
  • Surface becomes smoother

A larger interval (e.g. 0.05–0.08):

  • Less overlap
  • Less heat accumulation
  • Faster engraving
Laser engraving line interval comparison on MDF

Why This Matters in Practice

Line interval is not just about detail — it is a tool for managing heat.

If too much heat builds up:

  • Edges burn excessively
  • Contrast becomes too heavy

Increasing the interval slightly reduces how long the laser stays in one area, which reduces heat buildup.

Line Interval Takeaways

👉 Use smaller intervals (~0.03) when:

  • Detail matters
  • Smooth finish is required

👉 Use larger intervals (~0.05–0.08) when:

  • Engraving large areas
  • Jobs need to run faster
  • You want to reduce overburn without changing power

KEY INSIGHT

Line interval controls how heat is distributed across the surface

Recommended machines for laser engraving wood

The quality of your engraving depends heavily on beam control, airflow management, lens options, and machine stability.

These CO2 laser machines are commonly used for:

• MDF engraving
• detailed wood artwork
• production signage
• retail products
• layered wood projects

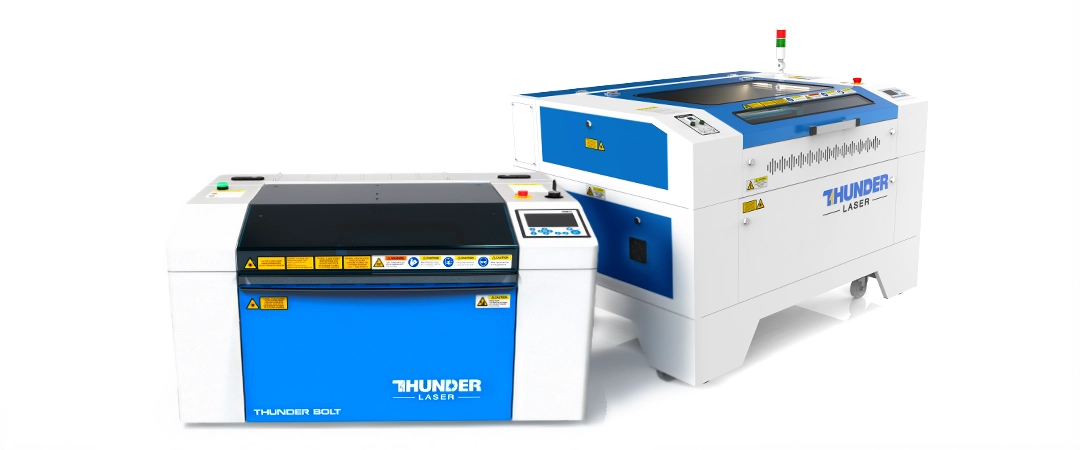
Thunder Nova Plus and Thunder Bolt laser machines
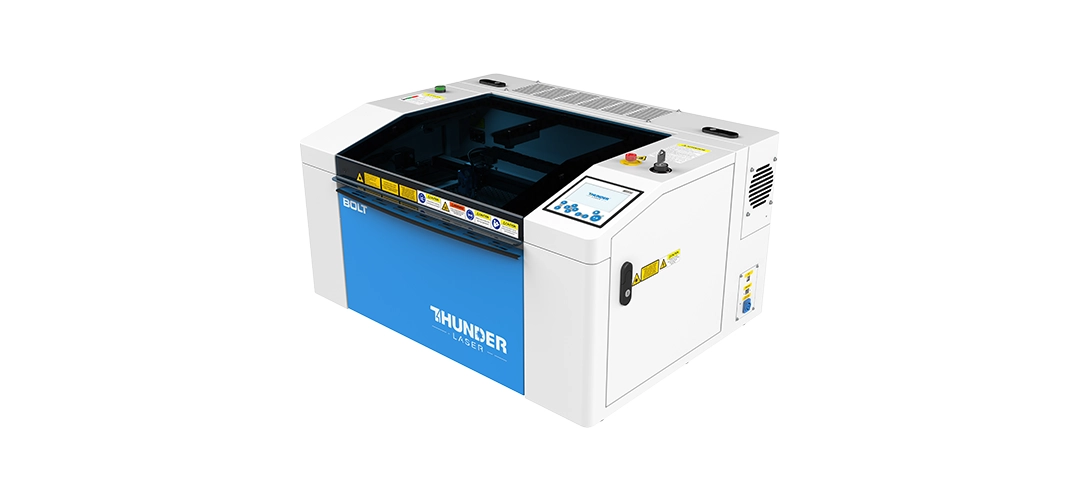
Thunder Bolt Product shot: Thunder Bolt CO2 laser cutting and engraving machine

Thunder Bolt

Wood engraving use: Small signs, gifts, prototypes, hobby projects.  


  • RF metal tube
  • Excellent for ultra-fine engraving
  • Best for premium products, detailed artwork, signage
  • Ideal for studios and home businesses
View Thunder Bolt
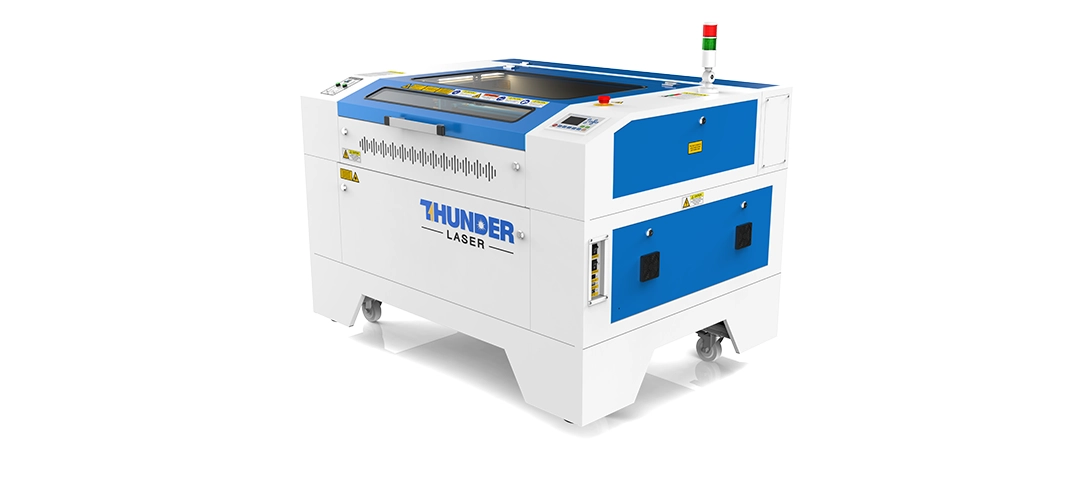
Thunder Nova 35 CO2 laser cutting and engraving machine for signage and décor

Thunder Nova 35 Plus

Wood engraving use: Retail products, custom décor, batch engraving


  • RF metal tube
  • Production-focused platform
  • Better for larger jobs and batch work
  • Excellent balance between engraving and cutting
View Thunder Nova 35

Have a look at our laser engraving machines 👇

Laser cutting & Engraving Machines

Related Laser Cutting & Engraving Guides

Frequently Asked Questions About Laser Engraving Wood

Yes. Laser engraving wood is popular because it allows small businesses to create custom products with relatively low material costs and high perceived value.

Many businesses start with:

  • personalised gifts
  • signage
  • wedding décor
  • branded products
  • home décor

A single machine often supports multiple product categories, which makes it attractive for side hustles and small workshops.

Yes. Many laser engraving businesses start from garages, spare rooms, or small workshops.

Modern desktop and small business laser systems make it possible to:

  • produce custom products
  • test new ideas
  • fulfil online orders
  • build a customer base

without needing a large factory setup.

Laser engraved wood is used for:

  • signs
  • layered wall art
  • wedding products
  • personalised gifts
  • restaurant branding
  • keyrings
  • product tags
  • packaging inserts
  • educational products
  • custom décor

Customisation is one of the biggest reasons laser engraved products sell well.

MDF is one of the most popular materials because it engraves consistently and produces strong contrast.

Other popular materials include:

  • plywood
  • hardwood
  • veneered MDF
  • bamboo

The best material depends on:

  • engraving detail
  • finish quality
  • production consistency
  • intended product style

Laser engraving works through controlled burning.

Darkening becomes excessive when:

  • too much heat builds up
  • airflow is incorrect
  • engraving speed is too slow
  • smoke stays trapped near the engraving area

Good airflow and proper heat control usually improve engraving clarity.

Patchy engraving is often caused by material inconsistency.

Common causes include:

  • uneven MDF density
  • glue variations
  • smoke contamination
  • incorrect focus
  • unstable airflow
  • dirty optics

Even sheets from the same supplier can engrave differently.

Airflow is one of the biggest factors affecting engraving quality.

Correct airflow helps:

  • remove smoke
  • reduce contamination
  • improve consistency
  • protect optics

Too much airflow can also reduce engraving contrast by cooling the burn too aggressively.

Blurry engraving is usually caused by:

  • incorrect focus
  • poor beam quality
  • excessive heat spread
  • dirty lenses
  • unstable material surfaces

Sharper engraving typically requires tighter beam control and better heat management.

Deep engraving:

  • creates stronger depth
  • produces darker contrast
  • increases heat buildup
  • reduces fine detail

Shallow engraving:

  • preserves sharp detail
  • produces cleaner edges
  • improves consistency
  • works well for fine graphics and text

The right approach depends on the product and visual style you want.

CO2 laser machines are the most common choice for wood engraving.

They are widely used for:

  • signage
  • gifts
  • décor
  • packaging
  • educational products

The best machine depends on:

  • material size
  • production volume
  • detail requirements
  • business goals

RF lasers generally produce:

  • tighter beam quality
  • finer detail
  • cleaner engraving
  • faster response times

Glass tube lasers remain popular because they are:

  • more affordable
  • effective for general engraving
  • widely used in small business environments

There is no universal speed setting.

Correct settings depend on:

  • material type
  • beam quality
  • airflow
  • engraving depth
  • line interval
  • machine power

Professional engraving quality comes from controlling heat consistently, not chasing generic settings.

Smaller line intervals produce:

  • smoother finishes
  • darker engraving
  • finer detail

Larger line intervals produce:

  • faster production
  • lighter engraving
  • less heat buildup

Line interval directly affects both engraving quality and production speed.

Smoke rises into the laser beam during engraving.

If smoke is not removed efficiently:

  • beam energy becomes inconsistent
  • engraving quality drops
  • soot buildup increases
  • contrast changes across the job

Proper airflow keeps the beam path cleaner and more stable.

No. Many beginners start producing professional-looking products quickly with the right training and machine setup.

Modern laser systems and software make it easier for:

  • hobbyists
  • side hustlers
  • small businesses
  • schools
  • makers

to begin producing sellable products.

  • There is no single universal setting because MDF thickness, density, glue content, machine power, lens choice, airflow, and desired finish all affect the result.
  • A safe starting point is to begin with a light test grid and adjust one variable at a time.
  • Start by prioritising consistent focus, moderate speed, controlled power, and low-to-moderate airflow.
  • If the engraving is too light, reduce speed slightly or increase power in small steps.
  • If the engraving is too dark or sooty, increase speed, reduce power, or improve airflow.
  • The best result comes from testing the specific MDF sheet you are using rather than relying on a generic preset.

MaxLaser helps customers with:

  • machine selection
  • setup guidance
  • technical support
  • training
  • materials
  • production advice

The goal is to help businesses move from experimentation to reliable production with long-term support.

MaxLaser Academy

Why Choose MaxLaser?

When you invest in a laser machine, you’re not just buying equipment. You’re choosing a partner that helps you succeed.

  • Improve cutting quality
  • Increase profitability faster
  • Scale with confidence
Get Started with MaxLaser Academy

Maxlaser installation and training

Delivery & Remote Training

Lifetime technical support

Lifetime Technical Support

Maxlaser Local South African Support, Stock & Spares

Local South African Stock & Spares

Maxlaser support: hands-on demo facility in Johannesburg

Hands-On Demo Facility

Maxlaser's real business setup guidance

Real Business Setup Guidance

MaxLaser warranty and after-sales

Warranty & After-Sales Backup

Frustrated with Inconsistent Wood Engraving?

Patchy contrast, blurry detail, excess soot, and unpredictable results usually come down to one thing:
Poor process control.

At MaxLaser, we help you build a setup that produces cleaner, sharper, more consistent engraving from day one. 

Speak to a Wood Engraving Specialist