Laser Engraving Rubber: How to Make a Professional Rubber Stamp

Laser engraving rubber is an accurate and efficient way to manufacture professional rubber stamps, especially when fine text, detailed logos and clean impressions are required.

In this MaxLaser workshop, we manufacture a complete rubber stamp from start to finish using a Thunder Bolt RF CO2 laser, a laser-compatible stamp plate and a Max Stamp self-inking holder.

You will see how the artwork is prepared, how the laser plate is engraved and cut, and how the finished plate is mounted into the stamp holder and tested. We also explain why the laser source and beam quality become increasingly important when engraving the small text and fine detail commonly found on professional rubber stamps.

Enquire About Rubber Stamp Equipment View Our Laser Engraving Machines
Workshop-Tested Process Fine-Detail Stamp Guidance  Machine and Consumable Support

Can You Laser Engrave Rubber?

Yes. Laser-compatible stamp rubber and polymer plates can be engraved with a CO2 laser to manufacture custom rubber stamps. The laser removes material around the artwork, leaving the required text, logo or design raised so that it can transfer ink onto paper when mounted into a stamp holder.

However, not every type of rubber or polymer is suitable for laser processing. Always use material specifically confirmed as laser compatible rather than engraving unidentified rubber sheets.

For this project, we use the laser plates supplied by MaxLaser, which are designed for manufacturing rubber stamps.

A professional rubber stamp can be produced by preparing the artwork correctly, engraving the design into a laser-compatible stamp plate, cutting the plate to size, cleaning it, mounting it into a stamp holder and testing the final impression.

Watch: Laser Engraving Rubber – How to Make a Rubber Stamp

Specifications and settings are useful, but seeing the complete manufacturing process makes it much easier to understand how a rubber stamp is actually produced.

In the main workshop video, we use the Thunder Bolt to manufacture a rubber stamp and take you through the process from digital artwork to the finished stamp impression.

What You’ll Learn

Prepare the Artwork

See how the artwork is prepared correctly for rubber stamp engraving so that the finished impression appears as intended.

Engrave the Laser Plate

Follow the engraving process and see how the Thunder Bolt produces the relief and fine detail required for stamp manufacturing.

Build the Finished Stamp

See how the engraved plate is prepared and mounted into a Max Stamp self-inking holder.

Test the Final Impression

The final test is not only how the engraved plate looks. It is how well the stamp transfers the text and artwork onto paper.

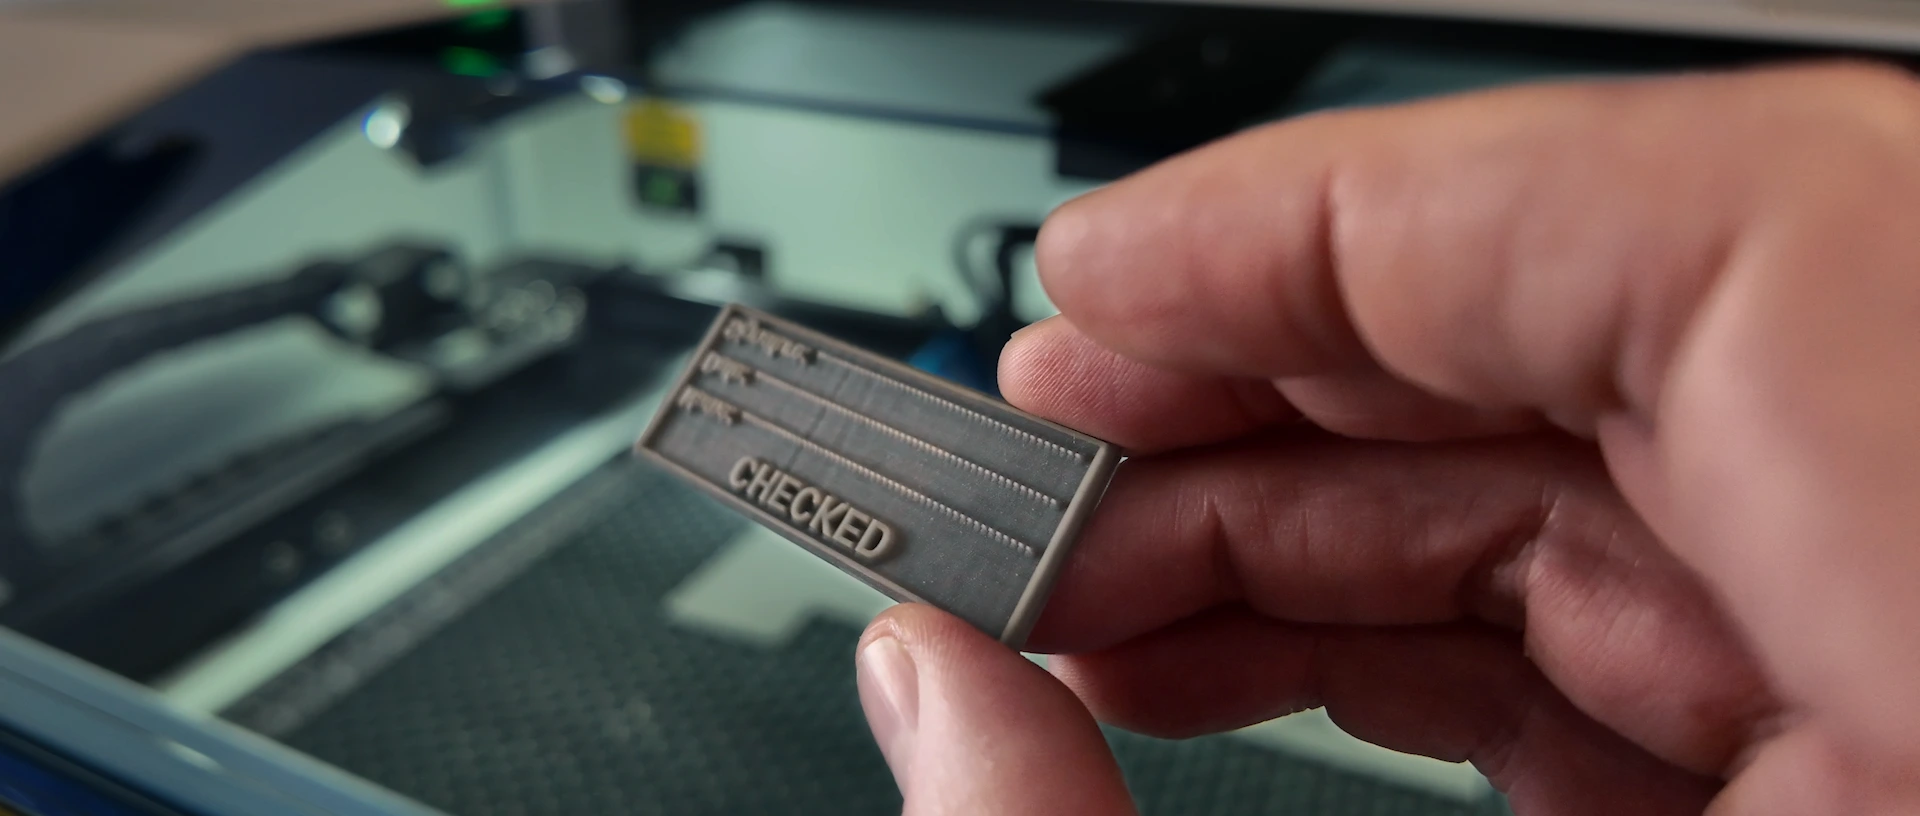
Close-up of fine text on a laser engraved rubber stamp plate

Why Rubber Stamp Engraving Requires Fine Detail

A rubber stamp may look like a simple laser engraving project, but producing a professional stamp is demanding on engraving quality.

The laser is not simply creating an image that looks good on the material. It must create raised characters and details that remain sufficiently defined to pick up ink and reproduce cleanly every time the stamp is used.

Small text makes this particularly challenging. As characters become smaller, the spaces between letters, internal areas of characters and fine lines become increasingly difficult to reproduce accurately. If too much material is removed or the engraving lacks sufficient resolution, fine details can begin to disappear or merge.

This is one of the reasons the laser system itself matters when manufacturing professional rubber stamps.

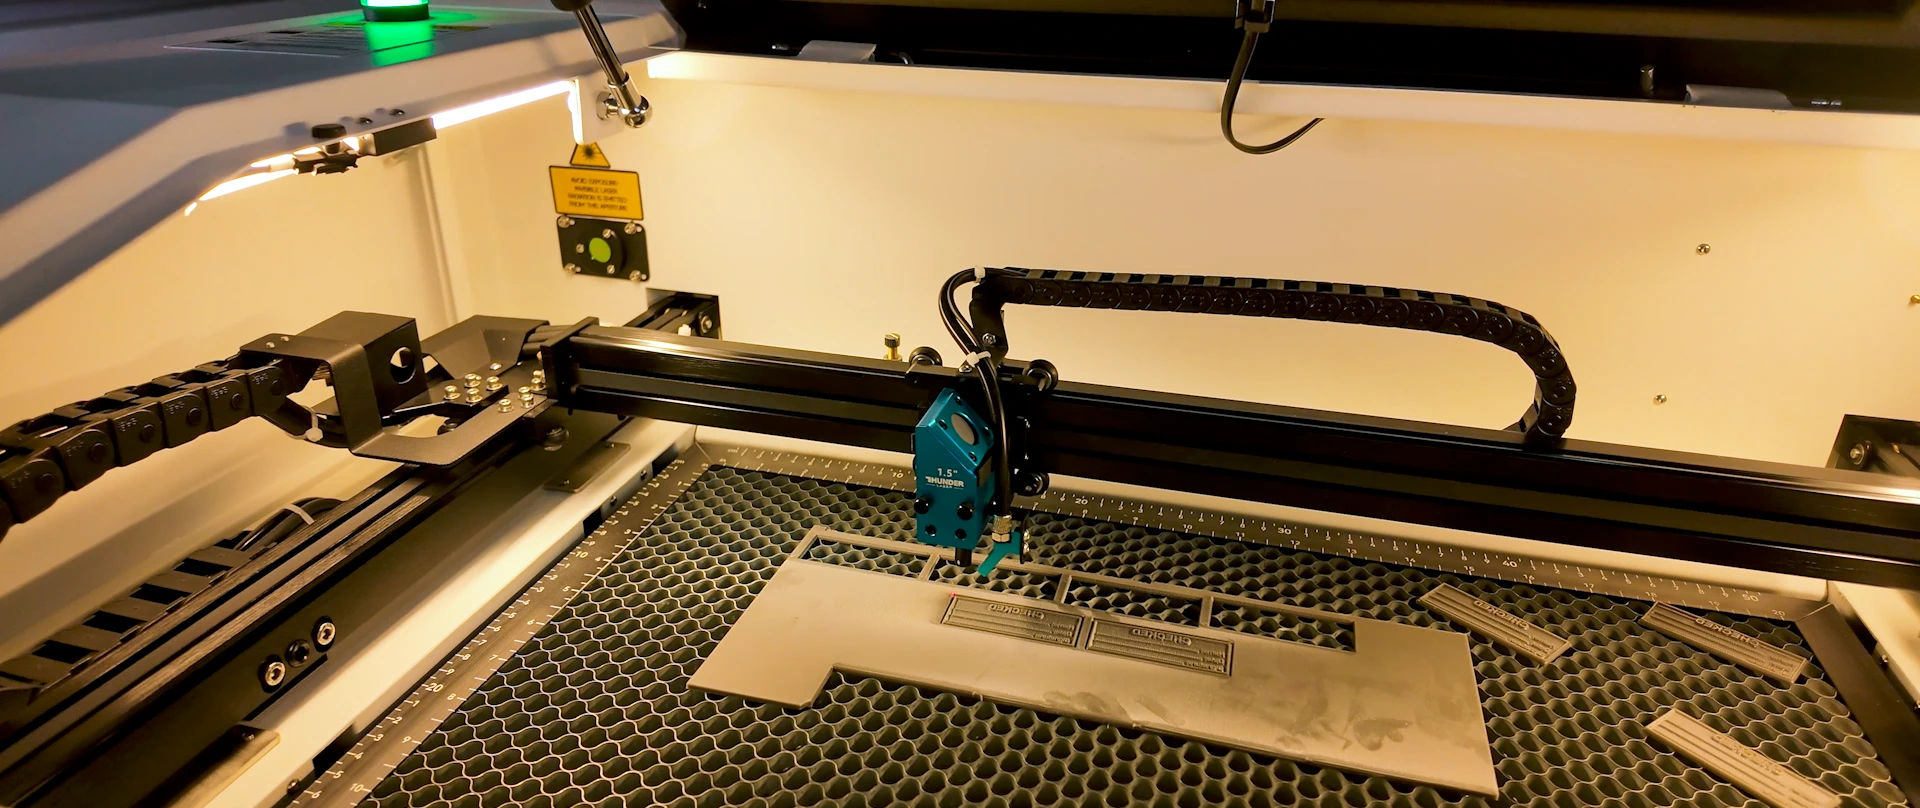
Thunder Bolt RF CO2 laser engraving multiple rubber stamp plates

Why We Use an RF CO2 Laser for Rubber Stamps

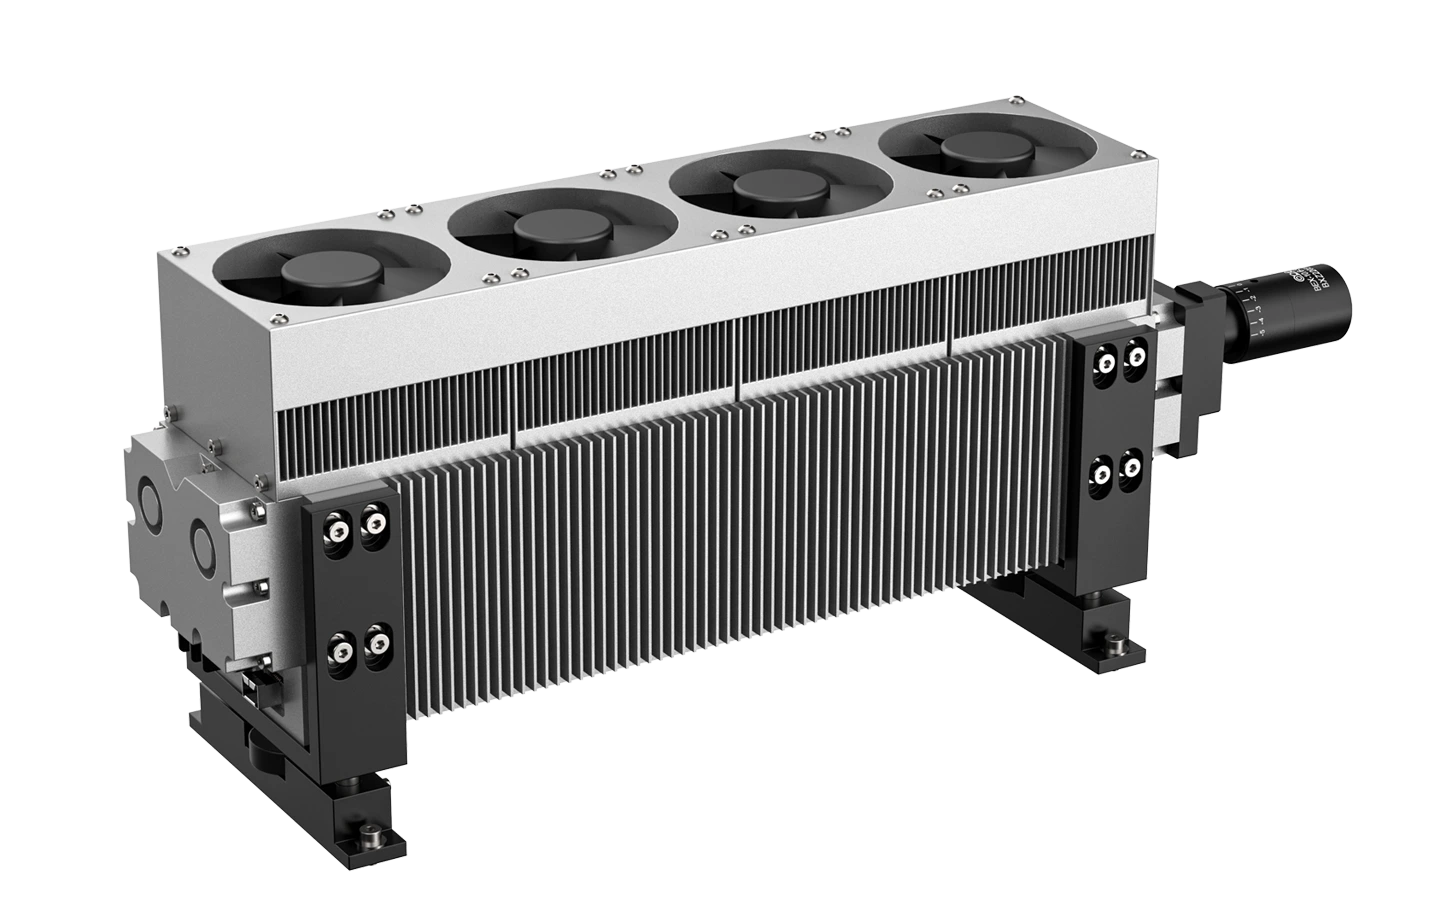
For this project, we used the Thunder Bolt, which is equipped with an RF metal CO2 laser source.

One advantage of an RF laser system for applications such as rubber stamp manufacturing is its ability to produce very fine, controlled engraving. The smaller effective beam characteristics and strong beam quality are particularly valuable when reproducing tiny lettering, detailed logos and closely spaced features.

In our own stamp-making experience, text around 7 pt and below becomes particularly demanding. The RF metal-tube machines we have tested have retained small character detail considerably better than the typical glass CO2 systems we have used for the same type of work.

That does not mean a glass CO2 laser cannot engrave rubber stamps. Larger text and less demanding designs may produce acceptable results. But as the artwork becomes smaller and more detailed, the advantages of a fine engraving beam become increasingly noticeable.

MaxLaser Workshop Observation: For professional rubber stamp production, particularly stamps containing very small text, we prefer an RF metal CO2 laser such as the Thunder Bolt because of the level of fine engraving detail we can achieve.

What Material Do We Use to Make the Stamp?

The material used for the engraving is sometimes described using several different names, including:

  • Laser stamp rubber
  • Stamp rubber
  • Laser polymer
  • Polymer stamp plate
  • Laser plate

At MaxLaser, we commonly refer to this material as a laser plate.

The important factor is not simply what the material is called. It needs to be a material specifically intended and confirmed for laser processing and stamp manufacturing.

When engraved correctly, material is removed around the design, leaving the text and artwork raised. This raised surface is what eventually receives the ink and creates the stamp impression.

From Laser Plate to Finished Max Stamp

The laser is only one part of the complete process.

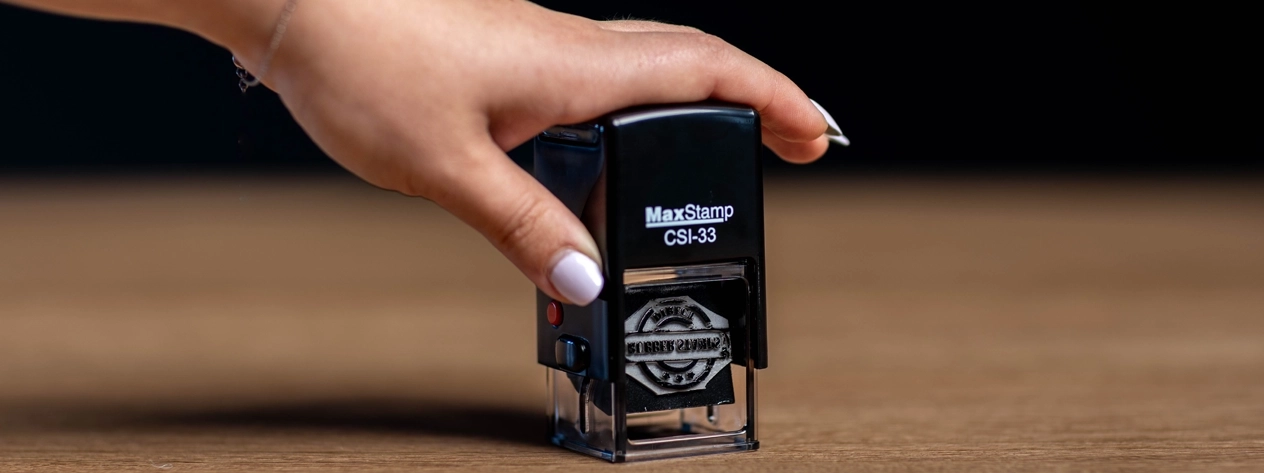
For this project, the engraved plate is combined with a MaxStamp self-inking holder, creating a complete ready-to-use rubber stamp.

StagePurpose
Prepare artworkCreate the stamp design in the correct orientation and format.
Engrave laser plateRemove the surrounding material and leave the stamp artwork raised.
Cut and prepare plateCut the plate to fit the chosen holder and clean it before mounting.
Mount into Max Stamp holderPosition the plate straight, centred and securely attached.
Ink and testCheck the final impression on paper.

This means a business equipped with the correct laser engraving machine, laser plates and stamp holders can manufacture customised stamps for a wide variety of customers.

What Types of Rubber Stamps Can You Make?

Once the production process is dialled in, the same workflow can be used for many different stamp applications, including:

Company document with a rectangular stamp impression and rubber stamp handle

Company stamps

Circular stamp impression with an abstract business logo mark and rubber stamp handle

Business logo stamps

Address card with location pin, blank address lines and rubber stamp handle

Address stamps

Pencil beside a rubber stamp and star stamp impression for teacher stamps

Teacher stamps

Product box with abstract stamped brand mark and rubber stamp handle

Packaging and branding stamps

Custom stamp plate and stamp impression with heart, sparkle and abstract personalised shapes

Custom personalised stamps

The same basic manufacturing workflow can be adapted to many different stamp designs and sizes.

How We Made Our Rubber Stamp with the Thunder Bolt

For this project, we used a Thunder Bolt RF CO2 laser to engrave and cut a laser plate before mounting the finished plate into a Max Stamp self-inking holder.

The basic workflow is straightforward:

Create the artwork -> mirror the design -> engrave the laser plate -> cut the plate -> clean it -> mount it -> test the stamp

The quality, however, comes down to getting each stage right, particularly the artwork preparation and engraving.

The first step is creating the design that will eventually become the raised surface of the stamp.

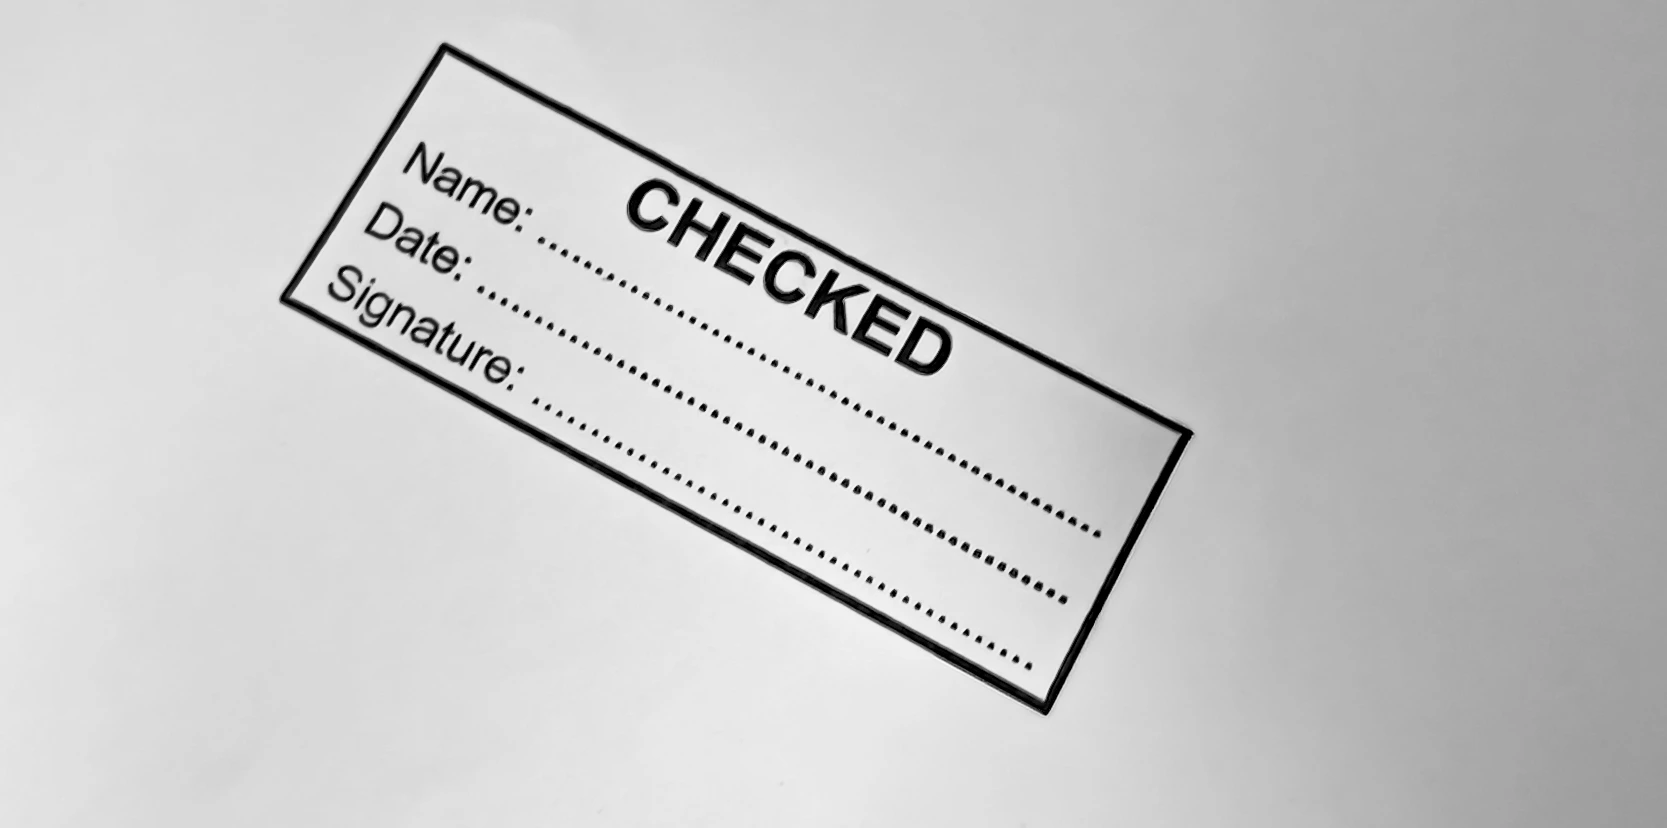
For our main workshop example, we created a rectangular CHECKED stamp containing:

  • CHECKED
  • Name:
  • Date:
  • Signature:

The design combines larger lettering, smaller text, fine lines and a border, making it a useful real-world test of engraving detail.

When preparing rubber stamp artwork, remember that the finished design must work as a physical stamp. Very fine lines, tiny characters and extremely tight spacing become progressively more demanding because the laser has to leave enough material behind to form a clean raised printing surface.

Yes, you need to mirror a rubber stamp design before engraving. The artwork engraved onto the stamp plate must be mirrored so that the final stamped impression reads correctly.

Think of the stamp plate as the reverse of what you ultimately want to see on paper. If the artwork is engraved normally, the resulting stamp impression will appear backwards.

OperationPurpose
EngravingThe black areas are engraved away to create the relief required for the stamp.
CuttingThe outer profile is cut after engraving so that the finished laser plate fits the stamp holder correctly.

Keeping the engraving and cutting operations on separate layers allows each process to use its own speed and power settings. This is important because engraving the surface and cutting through the plate require very different amounts of laser energy.

Once the artwork was prepared, we placed the laser plate into the Thunder Bolt and positioned the job over the material.

The plate needs to remain flat and correctly positioned throughout the engraving process. Movement during engraving can affect alignment and fine detail, particularly with small lettering.

  • Confirm the material is suitable for laser processing.
  • Make sure the plate is flat.
  • Check the focus.
  • Confirm the job position.
  • Ensure extraction is operating correctly.
  • Confirm that the mirrored artwork is correct.

This final check is worth doing before pressing start. A beautifully engraved stamp that reads backwards is still unusable.

This is where the Thunder Bolt begins removing the unwanted material surrounding the stamp design.

Settings We Used: Thunder Bolt + MaxLaser Laser Plate

SettingWorkshop Setting
Speed300 mm/s
Maximum Power70%
Minimum Power25%
Line Interval0.030 mm
Lines Per Inch846.67 LPI
Passes1
Scan Angle0 degrees
Ramp Length0.50 mm
Ramp Outer EdgeEnabled

These are the settings used for this particular project on our Thunder Bolt and laser plate. They should be treated as a starting reference rather than universal settings for every CO2 laser and every stamp material.

Machine wattage, laser source, optics, material formulation, focus and the required engraving depth can all influence the correct settings.

Why We Use a Fine Line Interval for Rubber Stamps

Our main workshop engraving used a 0.030 mm line interval, equivalent to approximately 846.67 lines per inch in the LightBurn setup shown in the page plan.

The close spacing between engraving lines helps produce a detailed engraved surface, which becomes increasingly important when the design contains small lettering and fine features.

But simply increasing engraving resolution is not a substitute for the correct laser system, artwork and settings. Fine-detail stamp production is the result of those factors working together.

One setting worth paying attention to is the ramp.

  • Ramp Length: 0.50 mm
  • Ramp Outer Edge: Enabled

Instead of creating an entirely vertical wall immediately beside the raised printing surface, ramping can create additional material support around the base of fine features.

That becomes useful on small text and thin elements because the raised surface needs enough structural support to withstand repeated stamping. Think of it as creating a broader foundation underneath the fine raised detail rather than leaving a very narrow vertical column.

Once everything is confirmed, the engraving can begin.

The laser scans across the plate, removing the surrounding material while leaving the mirrored stamp artwork raised. This is where the fine engraving capability of the RF CO2 source becomes particularly noticeable.

The goal is not simply to engrave deeply. We want to maintain:

clean character edges + sufficient relief + fine detail + adequate support around the characters.

Too little material removal may allow unwanted areas to contact the paper. Too aggressive an engraving process can begin compromising small characters and fine lines.

The objective is controlled relief rather than simply maximum depth.

After engraving, the outside profile of the stamp plate is cut.

Because the engraving and cutting operations were prepared separately in the software, the Thunder Bolt can cut the plate around the finished design. This produces a stamp plate sized for mounting onto the selected Max Stamp holder.

Accurate cutting is important because the engraved plate needs to sit correctly and squarely on the holder. If the plate is mounted out of alignment, the stamp impression will also be out of alignment.

Laser engraving removes a significant amount of material when producing the relief required for a stamp, so residue can remain on the plate after processing.

The engraved plate should therefore be cleaned before it is mounted.

  • Small lettering
  • Fine lines
  • Internal character spaces
  • Deep engraved areas
  • Edges around the raised printing surfaces

The goal is to remove loose engraving residue without damaging the fine raised features that will form the stamp impression.

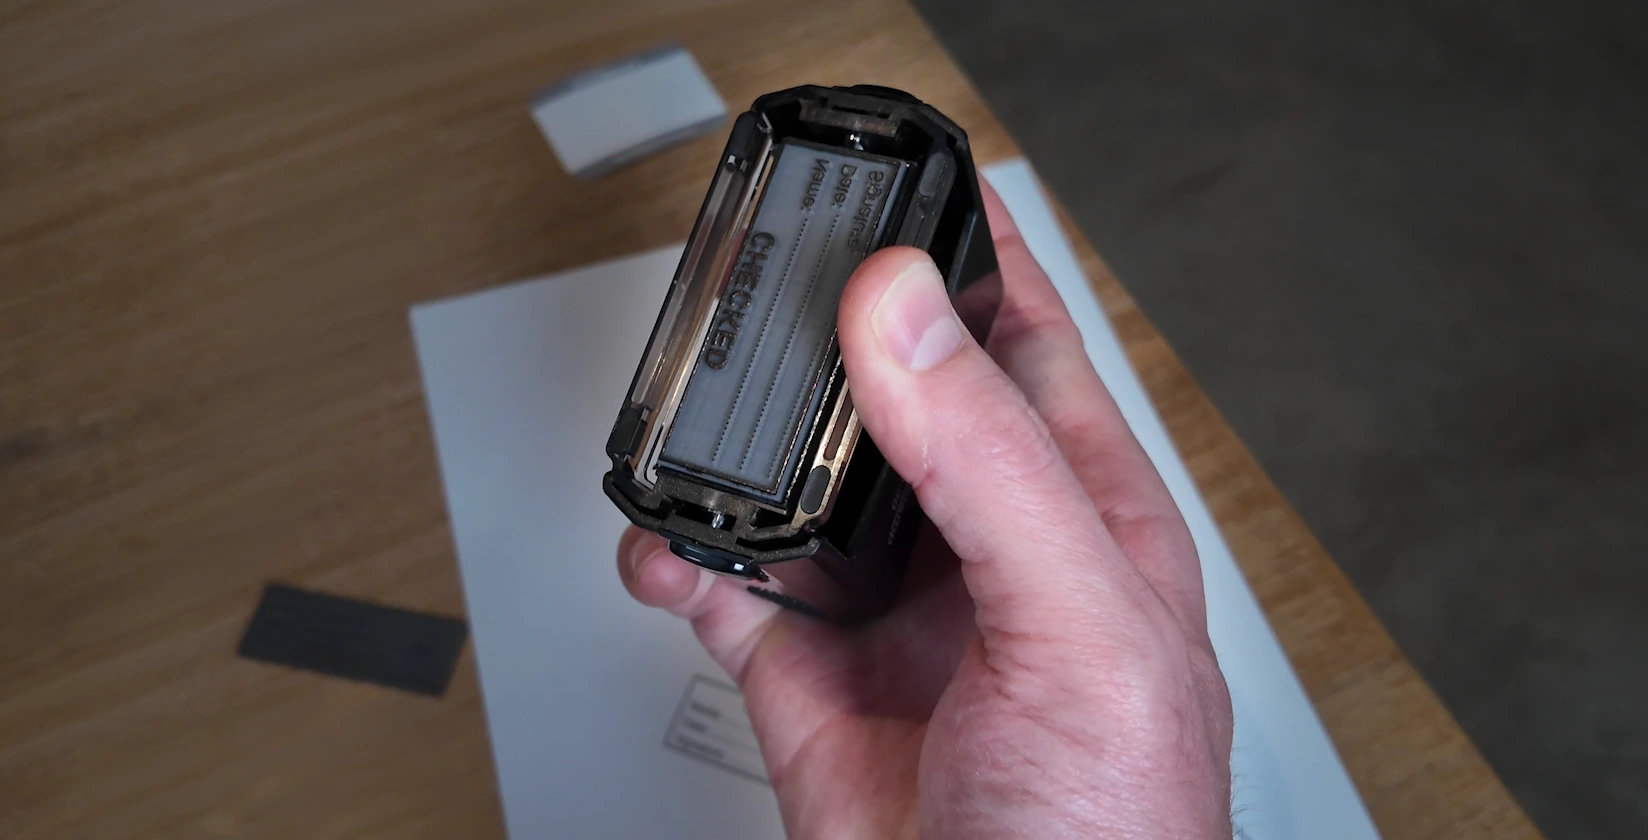
Once the laser plate has been engraved, cut and cleaned, it can be mounted onto the Max Stamp self-inking holder.

Positioning is important. The plate needs to be:

straight, centred and securely attached.

Before permanently fixing the plate, check its orientation carefully. Because the artwork has been mirrored, it can be easy to become disorientated when looking directly at the engraved plate.

Once mounted correctly, the self-inking mechanism applies ink to the raised surface between impressions.

The final step is the most important one: make an actual stamp impression.

  • Clean text
  • Clearly separated characters
  • Straight lines
  • Fine detail
  • Consistent ink coverage
  • A clean outer area without unwanted marks

In our test, the finished stamp reproduced the design onto paper, allowing us to assess the actual output rather than relying only on the engraved plate.

What Makes a Good Laser-Engraved Rubber Stamp?

A good laser-engraved rubber stamp is judged by the final paper impression. The engraved plate needs to look clean, but the real quality test is whether it transfers ink clearly and consistently.

Quality factorWhat to check
Clean raised detailText, logos and fine lines remain clearly defined.
Correct engraving depthBackground areas do not transfer unwanted ink.
Support around fine featuresSmall text and thin details have enough shoulder support.
Accurate mirroringThe final impression reads correctly.
Clean cuttingThe plate fits the holder properly.
Correct mountingThe plate is straight, centred and secure.
Clean test impressionThe stamp works on paper, not only on the workbench.


Laser engraved rubber stamp plate mounted in a self-inking stamp holder

Our Rubber Stamp Result

The most important result is not only that the plate was engraved. The important result is that the finished stamp produced a readable impression on paper.

In the main workshop, the Thunder Bolt, laser plate and Max Stamp holder formed a complete rubber-stamp production workflow: artwork preparation, mirrored engraving, cutting, cleaning, mounting and final testing.

The process also showed why small text requires careful setup. Fine detail depends on the artwork, material, laser source, focus, line interval, ramping and final test impression.

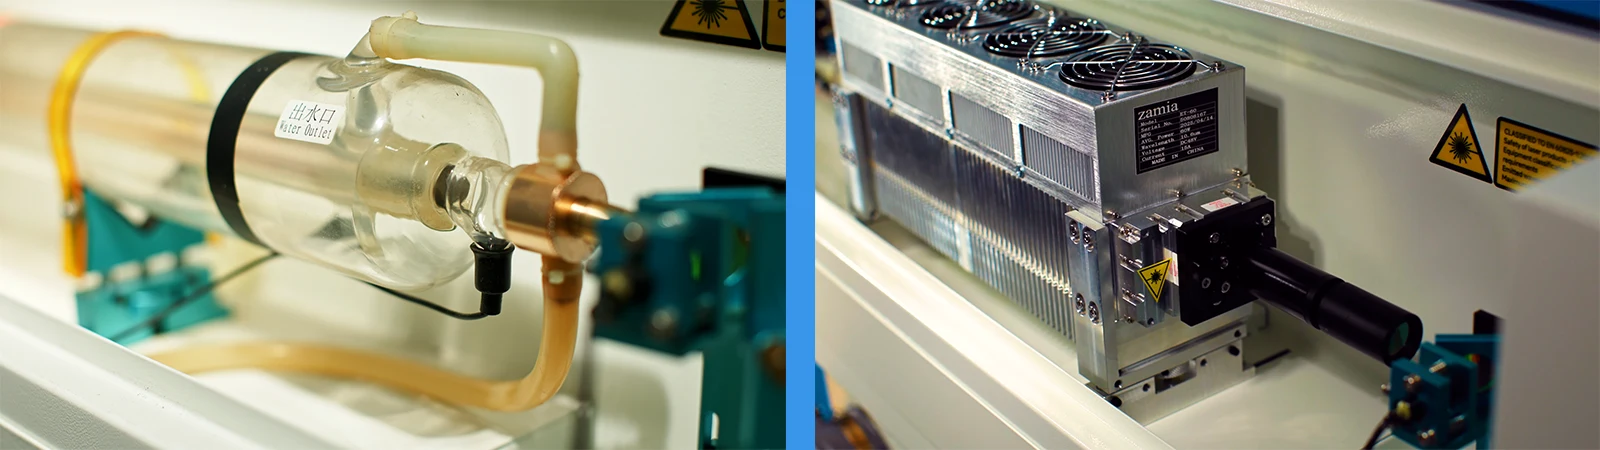
Glass CO2 laser tube and RF metal CO2 laser tube comparison

RF Metal vs Glass CO2 Laser Tubes for Rubber Stamp Engraving

RF metal CO2 laser systems are our preferred choice for professional rubber stamp production because rubber stamps often contain small characters, thin lines and detailed logos.

Glass CO2 laser machines can engrave rubber stamps, especially when the design uses larger text and simpler artwork. The difference becomes more noticeable when the artwork is small and detailed.

Factor

RF metal CO2

Glass CO2

Fine text

Preferred for very small text and fine detail.

Can work for larger, less demanding designs.

Stamp production

Strong choice for regular professional production.

May suit occasional or simpler stamp work.

Recommendation status

MaxLaser preference for detailed stamp manufacturing.

Qualified option, not ruled out.


What Happens When the Text Gets Very Small?

Small text leaves less material to form the raised printing surface. If the engraving is too aggressive, the laser can remove too much surrounding material and weaken the detail that should remain.

As letters become smaller, internal spaces, thin strokes and closely spaced characters become harder to preserve.

Our Experience with Text Around 7 pt and Smaller

In our workshop experience, text around 7 pt and below is where stamp engraving becomes particularly demanding.

At that size, the laser, optics, focus, material and settings all need to work together. This is one of the reasons we favour RF metal CO2 systems for professional stamp work.

Why We Recommend the Thunder Bolt for Rubber Stamp Production

The Thunder Bolt is our primary recommendation for the rubber stamp project featured in this guide because it is the machine used in the workshop and it is well suited to fine-detail engraving work.

Best Suited For

  • Fine text
  • Detailed logos
  • Professional rubber stamp manufacturing
  • Compact stamp-production workflows
  • Businesses that need repeatable engraving detail

The recommendation comes from the demands of the application rather than simply recommending the most expensive machine.

How to Improve Fine Detail When Laser Engraving Rubber

Professional stamp quality comes from balancing artwork, material, laser setup and testing.

Start with Clean Artwork

The design must work as a physical stamp. Remove unwanted background elements, keep text legible and convert artwork correctly before engraving.

The supporting Design with Leigh tutorial shows a practical design workflow: trace the artwork, remove white background areas, centre the design, convert text to curves, create a cut line and mirror the complete design.

Do Not Automatically Increase the Power

Increasing power is not always the answer. If too much material is removed, small characters and fine detail can be compromised.

The goal is controlled relief with enough shoulder support, not simply the deepest possible engraving.

Pay Attention to Line Interval

Line interval determines how closely the laser’s engraving passes are positioned.

For our main workshop project, we used a 0.030 mm line interval. A fine interval can help create a detailed and consistent engraved surface, but it also increases the amount of laser processing.

The correct interval should be considered together with speed, power, material and required detail.

Use Ramping to Support Fine Characters

Ramping helps create a shoulder around the raised details. This can support small text and thin features that need to survive repeated stamping.

Focus Matters

Focus affects engraving detail. Before engraving rubber stamp material, confirm focus carefully and keep the plate flat so the beam remains consistent across the job.

Common Problems When Laser Engraving Rubber Stamps

Problem

Possible Cause

What to Check

Small text looks unclear

Detail too fine for current setup

Artwork, focus, beam characteristics and settings

Internal areas of letters disappear

Excessive material removal or insufficient detail

Power, artwork size and engraving parameters

Stamp prints unwanted background areas

Insufficient relief

Engraving depth and plate preparation

Stamp impression reads backwards

Artwork was not mirrored

Mirror complete design before engraving

Impression is uneven

Plate or holder is not level or aligned

Mounting and plate flatness

Stamp looks good but prints poorly

Relief or ink transfer issue

Test the actual impression rather than judging the plate visually

Excessive engraving residue

Normal material removal or unsuitable parameters

Cleaning, settings and extraction

The purpose of troubleshooting should always be to diagnose the cause rather than simply increasing the power.

The Final Stamp Impression Is Your Quality Test

With acrylic, wood or leather, you generally inspect the engraved surface itself.

With a rubber stamp, the engraved plate is not the final product experience. The final test is the impression on paper.

  • Small characters
  • Internal letter spaces
  • Fine lines
  • Borders
  • Logo detail
  • Ink consistency
  • Unwanted background marks
  • Overall alignment

If tiny characters are clearly readable on paper, that is a much stronger indication of engraving quality than simply looking at the plate.

Can You Laser Engrave Any Type of Rubber?

No. You should never assume that an unidentified rubber or polymer is safe to laser engrave.

Different rubber and polymer formulations can contain additives that may produce hazardous or corrosive decomposition products when heated by a laser.

For stamp manufacturing, use material specifically supplied or confirmed by the manufacturer as suitable for laser processing.

At MaxLaser, we use and supply laser plates intended for rubber stamp production, which removes the guesswork around selecting an appropriate stamp material.

Before Engraving Any Rubber or Polymer

  • The exact material composition where possible.
  • That the supplier approves it for laser processing.
  • Appropriate extraction requirements.
  • Recommended laser-processing guidance.

If the material cannot be positively identified, do not laser it until its suitability has been confirmed.

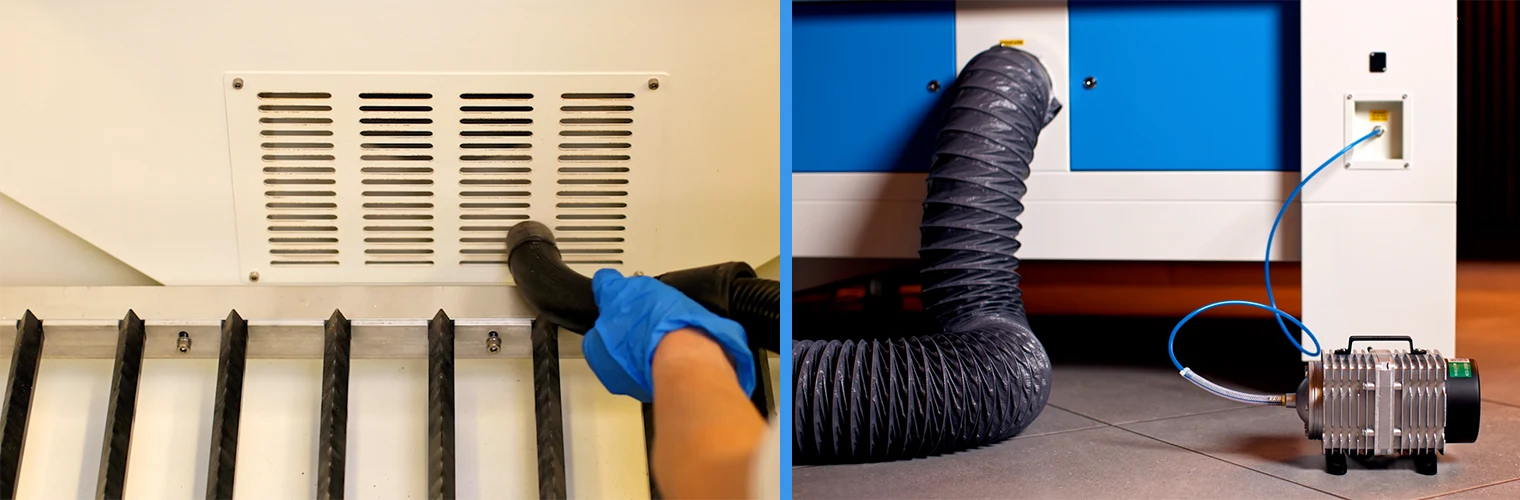
cleaning laser machine extraction ports and ducting to maintain airflow

Extraction Is Particularly Important When Engraving Stamp Material

Rubber and polymer engraving removes considerably more material than a light surface marking process.

  • Removing fumes from the work area
  • Maintaining visibility inside the machine
  • Reducing residue accumulation
  • Protecting optics and internal components
  • Maintaining a cleaner working environment

Your extraction system should be operating correctly before engraving begins, and the laser machine itself should be maintained regularly when rubber stamp production forms a significant part of your workload.

For related maintenance guidance, see MaxLaser’s laser machine maintenance guide.

Thunder Laser RF CO₂ laser source with four cooling fans and heat sinks.

Is an RF Laser Worth It for a Rubber Stamp Business?

If rubber stamps are only an occasional product and your designs contain relatively large, simple artwork, a suitable glass CO2 laser may be sufficient.

But if you are building a business around professional rubber stamp manufacturing, particularly where customers require small text and detailed logos, we would favour an RF CO2 system.

Production need

Recommendation

Occasional, simple stamp work

A suitable CO2 laser may be sufficient.

Regular professional stamp production

An RF CO2 laser becomes considerably more attractive.

Fine text and detailed logos

We strongly favour the Thunder Bolt or another suitable RF CO2 engraving system.


The Key to Professional Rubber Stamp Engraving

1. Artwork

The design must be suitable for engraving at the required size.

2. Material

Use a consistent, laser-compatible stamp plate.

3. Laser

Fine-detail engraving benefits significantly from a precise laser system.

4. Settings

Speed, power, line interval, focus and ramping all influence the final result.

Most importantly, do not judge success by how deep the engraving looks. Judge it by the stamp impression.

What Rubber Stamps Can You Make with a Laser Engraver?

Once you have established a reliable rubber stamp engraving workflow, the same process can be used to manufacture a wide range of customised stamps.

Because the artwork is created digitally, each stamp can be personalised for an individual customer or produced repeatedly for larger orders.

  • Company stamps
  • Logo stamps
  • Address stamps
  • Teacher and school stamps
  • Loyalty-card stamps
  • Packaging and branding stamps
  • Wedding and event stamps
  • Craft and personalised stamps

Can You Start a Rubber Stamp Business with a Laser Engraver?

Yes. Rubber stamp manufacturing can be added as a standalone service or as an additional product line within an existing printing, engraving, signage, stationery or personalisation business.

One advantage is that each finished product combines relatively compact raw materials with custom artwork and manufacturing.

You are not simply selling a piece of laser plate. You are selling:

Design + personalisation + engraving + stamp hardware + finished product

That added value is what creates the commercial opportunity.

A laser engraving machine can also be used for many other products, allowing a business to manufacture rubber stamps while using the same machine for additional engraving applications.

Potential Customers Include

  • Businesses
  • Schools and teachers
  • Accountants
  • Attorneys and professional practices
  • Warehouses
  • Retail stores
  • Restaurants and cafes
  • Wedding suppliers
  • Craft businesses
  • Packaging companies
  • Individuals requiring personalised stamps

This gives stamp manufacturers access to both business-to-business and consumer markets.

What Equipment Do You Need to Make Rubber Stamps?

A professional rubber stamp production setup does not need to be complicated.

At its core, you need three main components:

1. A Suitable CO2 Laser Engraving Machine

The machine engraves the stamp artwork into the laser plate and can cut the finished plate to the required size.

For professional production involving fine text and detailed artwork, our preference is an RF metal CO2 laser system.

2. Laser Plates

These are the laser-compatible stamp plates that are engraved to create the raised printing surface.

Consistency matters because changes in material can affect engraving results.

3. Stamp Holders

Once engraved, cut and cleaned, the plate is mounted into the appropriate holder.

MaxLaser supplies a range of Max Stamp self-inking stamp holders for different stamp sizes and applications.

Recommended Laser Machines for Rubber Stamp Production

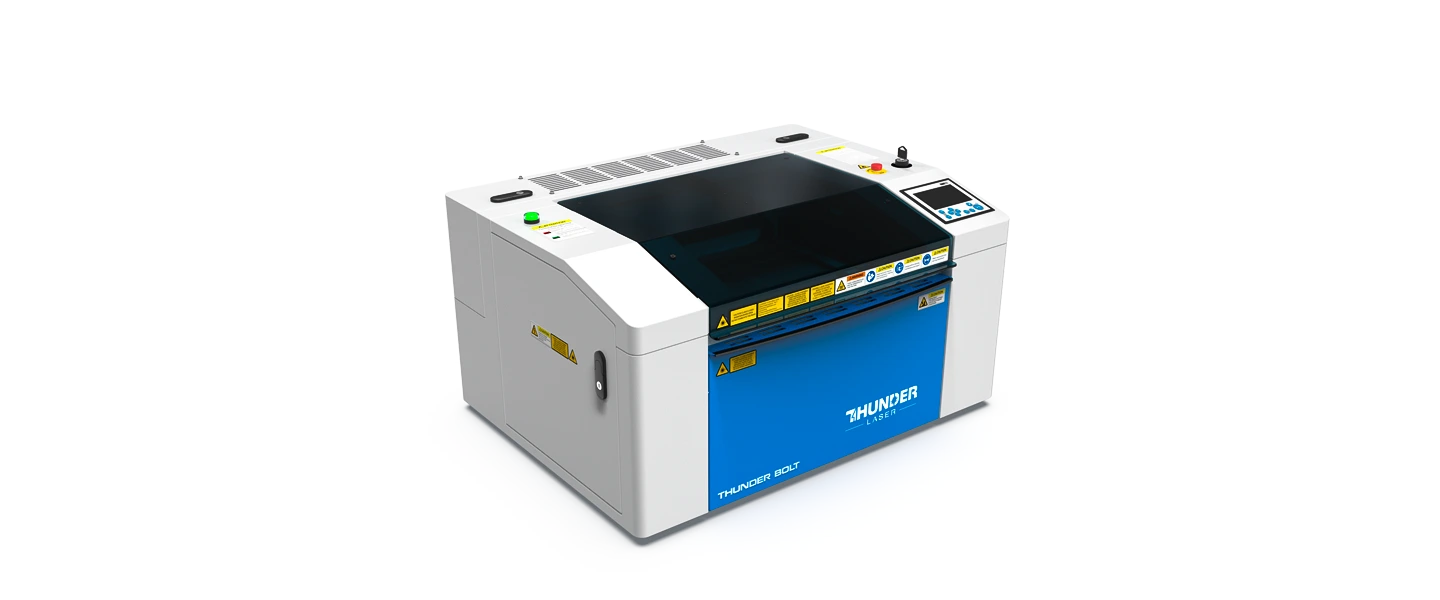
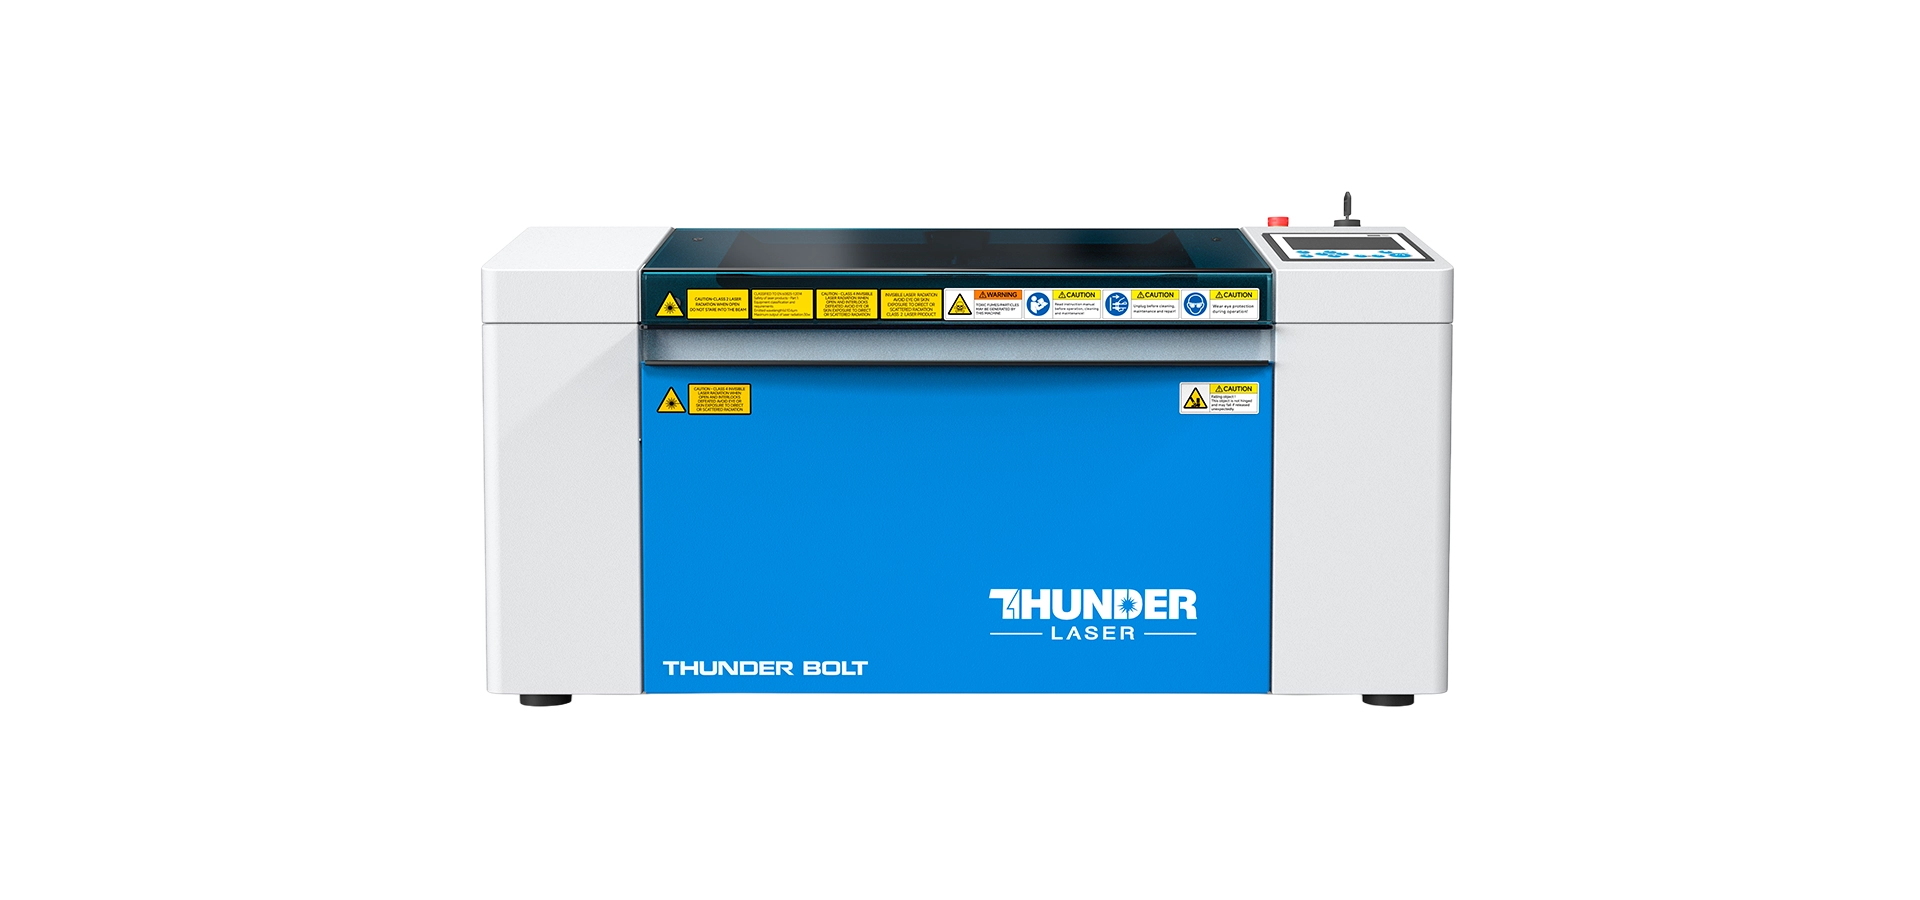
Thunder Bolt professional desktop CO2 laser cutter and engraver

Thunder Bolt: Our Recommended Choice for Rubber Stamps

Best for: Fine text, detailed logos and professional rubber stamp manufacturing

The Thunder Bolt is our primary recommendation for rubber stamp production and is the machine we used for the project featured in this guide.

Its RF metal CO2 laser source makes it particularly well suited to the fine-detail engraving required for small characters and detailed stamp artwork.

Why We Recommend It

  • RF metal CO2 laser source
  • Excellent fine-detail engraving
  • Well suited to small lettering
  • High engraving speeds
  • Can engrave and cut the laser plate
  • Compact professional machine
  • Suitable for dedicated stamp production
  • Can also manufacture many other personalised products
View Thunder Bolt
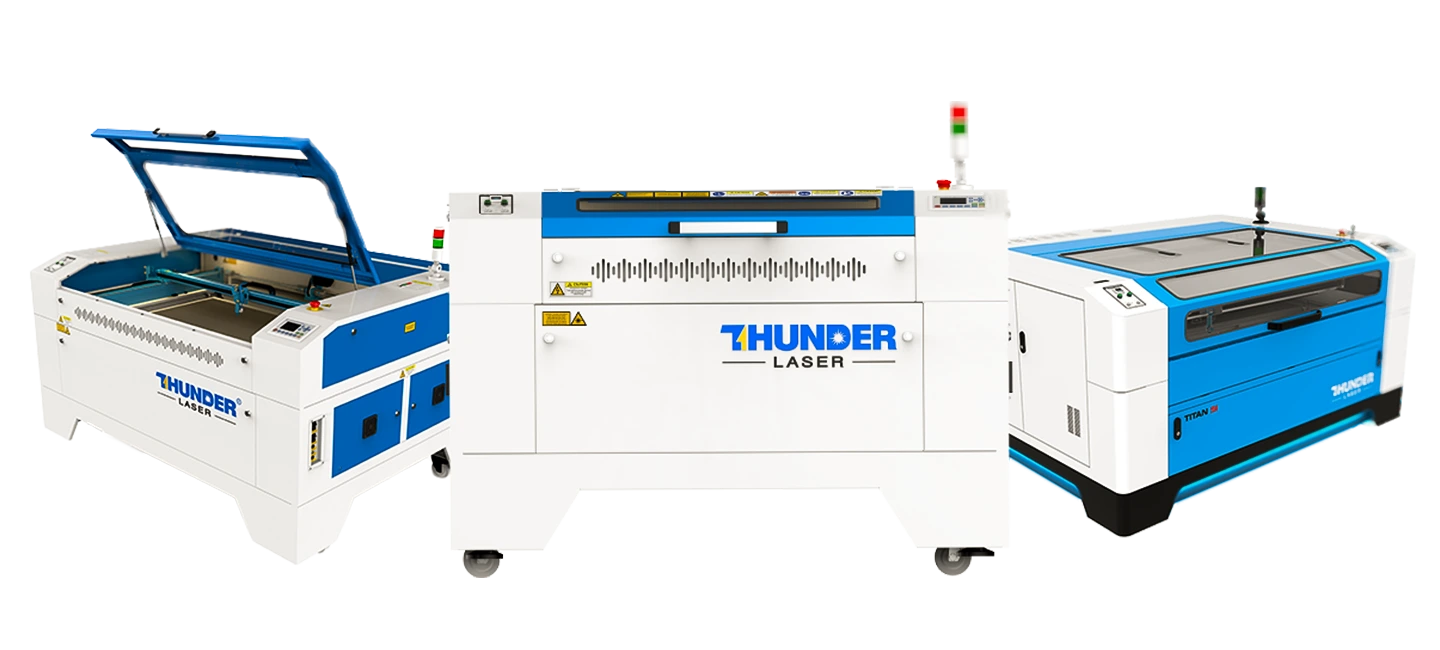
Range of Thunder Laser CO2 laser machines for professional engraving businesses

Need a Larger Professional Laser?

If rubber stamps are only one part of a broader engraving business, a larger professional RF-equipped laser may make more sense where additional working area or production capability is required.

Rather than listing machines that are not ideal for stamp production, guide the customer toward the appropriate MaxLaser range based on the products they intend to manufacture.

Explore Laser Engraving Machines

Max Stamp Holders and Laser Plates

Making the engraved plate is only part of producing a finished rubber stamp.

MaxLaser also supplies the consumables and hardware required to turn that engraved plate into a completed product.

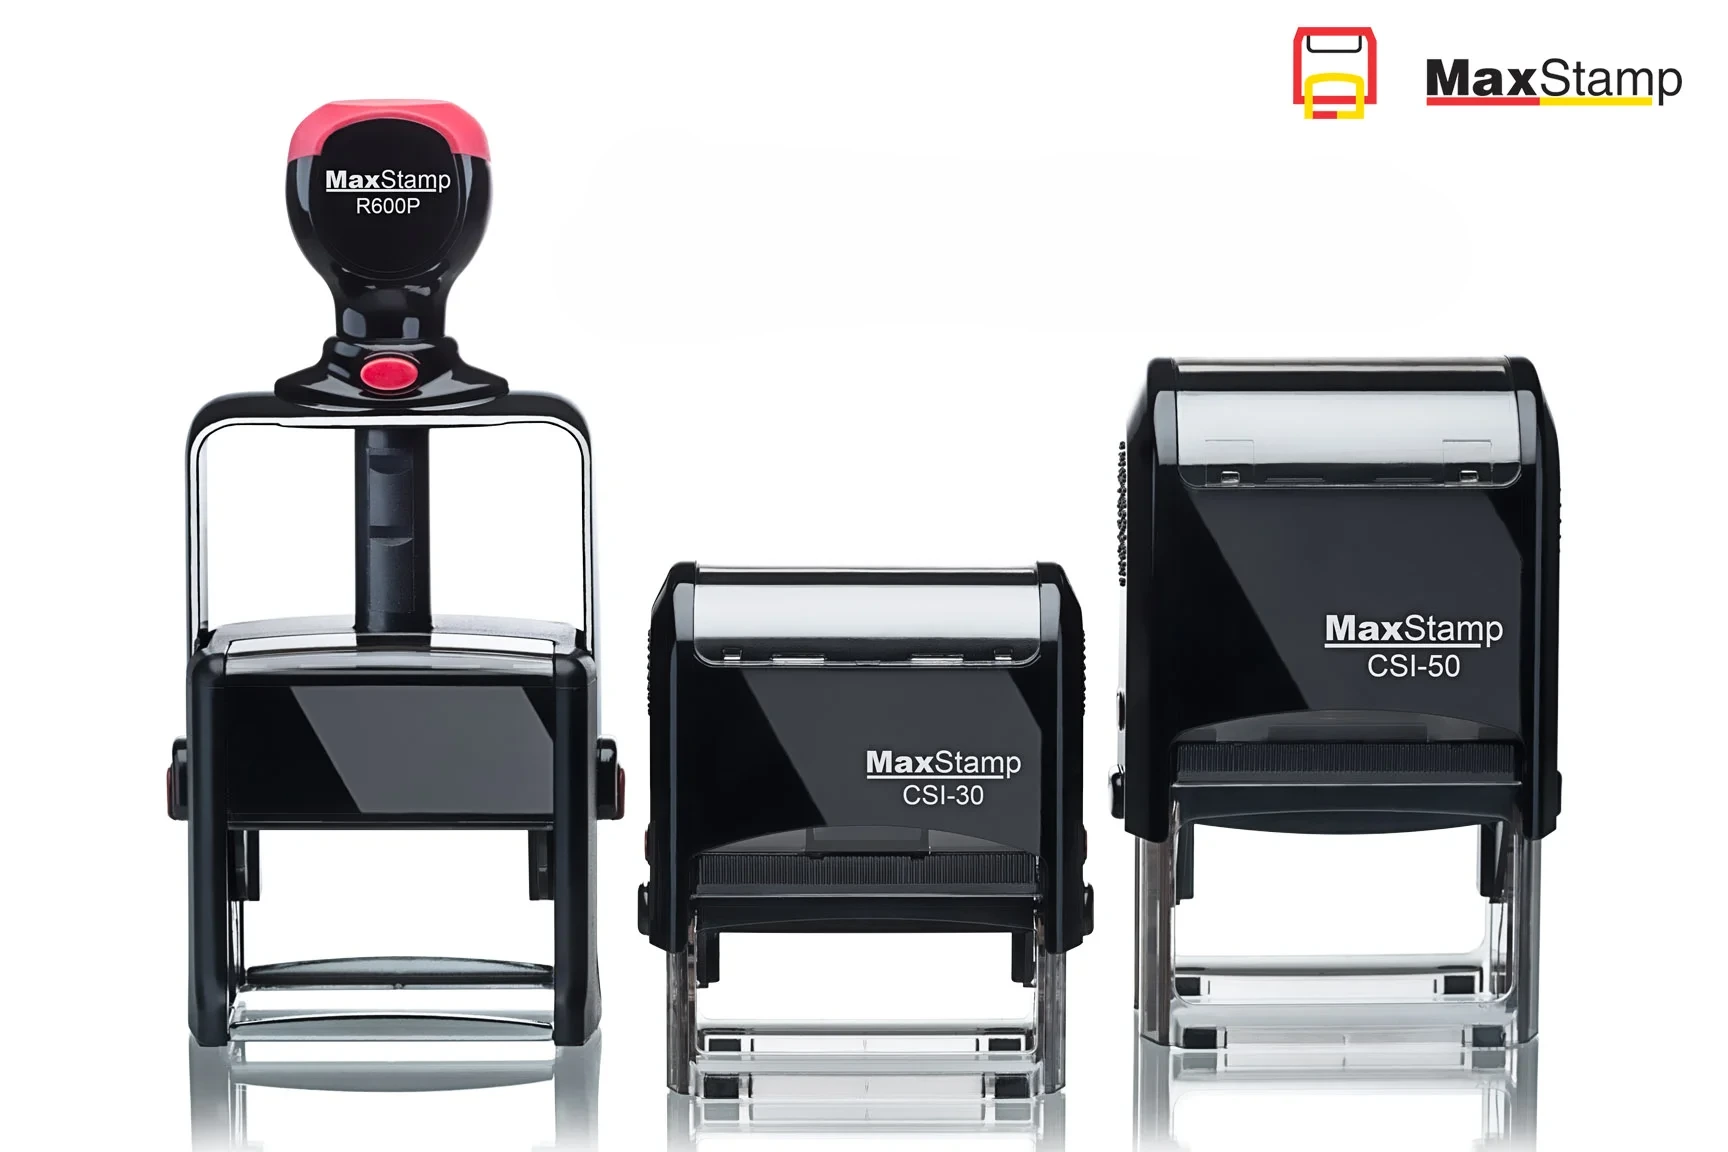
MaxStamp self-inking rubber stamp holders in different sizes

MaxStamp Self-Inking Holders

Our Max Stamp range provides self-inking stamp holders in different sizes, allowing businesses to match the holder to the artwork and application.

Once the engraved plate is mounted, the self-inking mechanism automatically re-inks the stamp between impressions, creating a convenient finished product for the customer.

View MaxStamp Holders
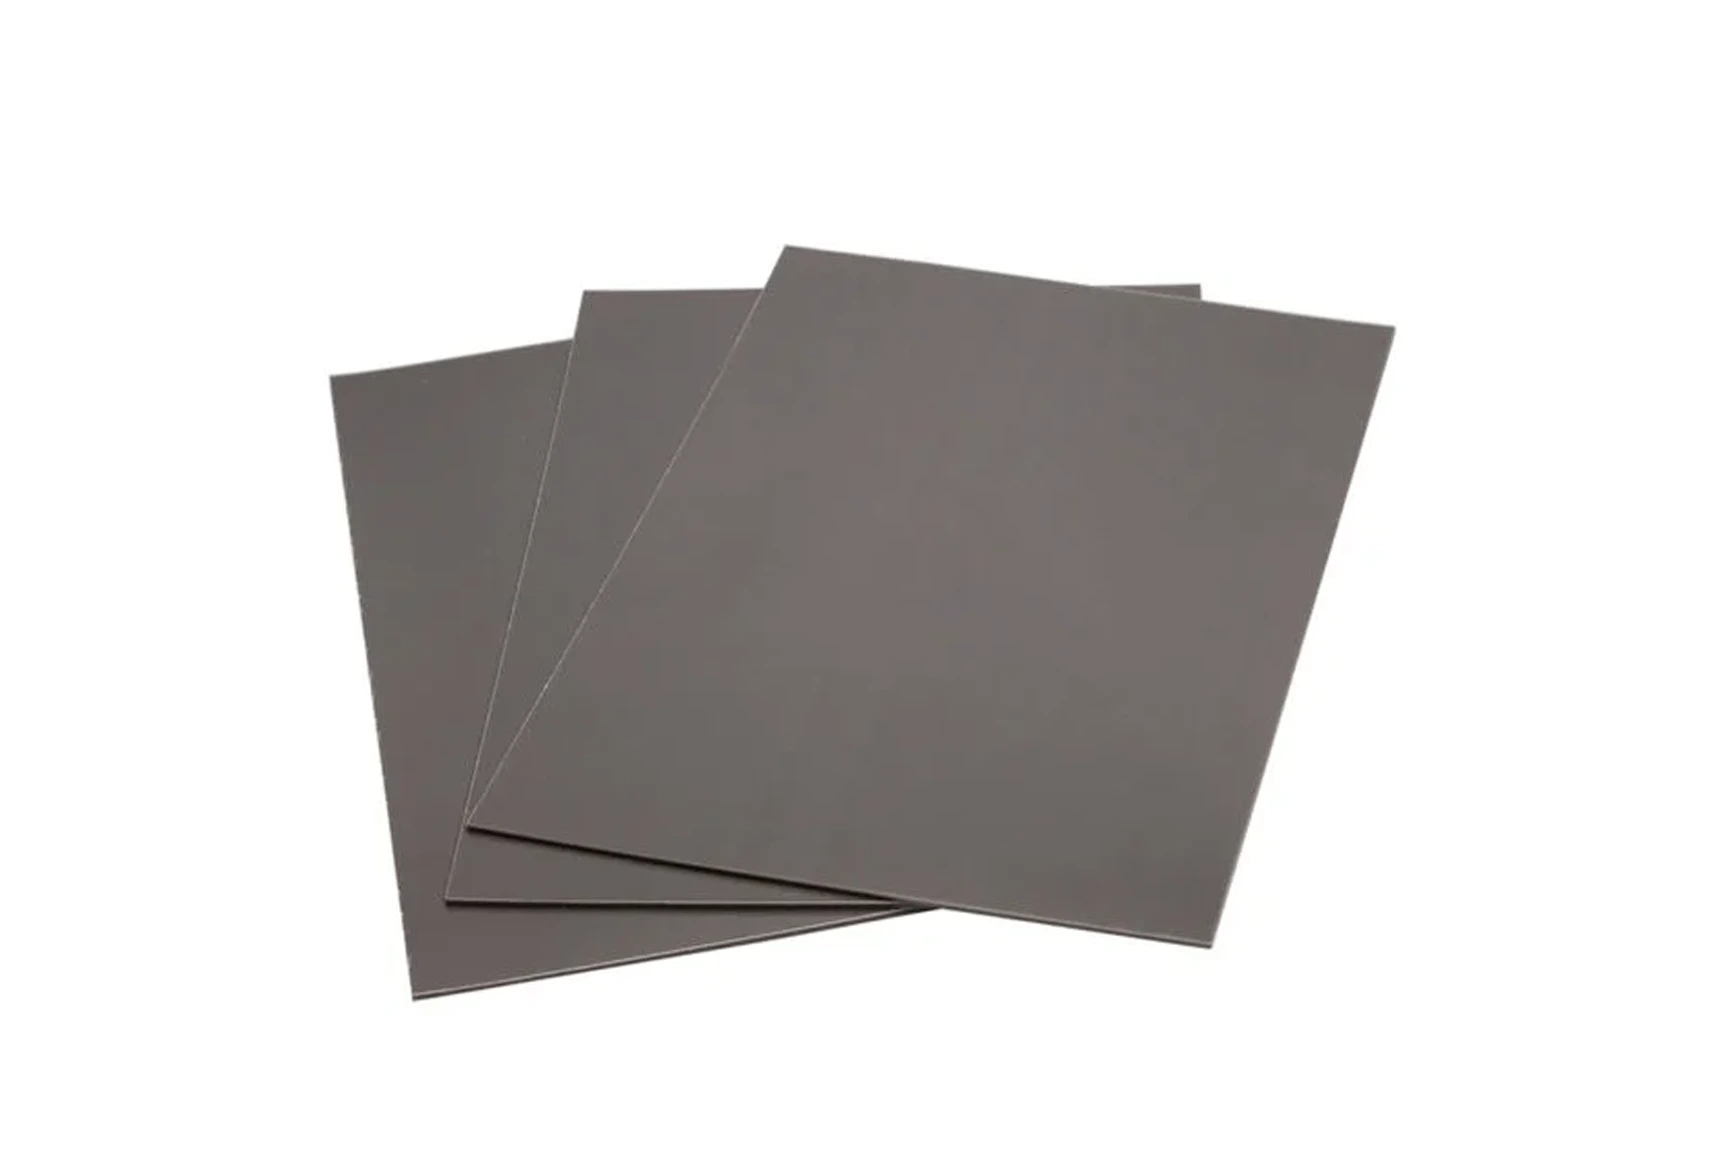
Laser-compatible rubber stamp plates for CO2 laser engraving

Laser Plates for Rubber Stamp Text

MaxLaser also supplies the laser plates used to manufacture the engraved stamp surface.

Using a material intended for laser stamp production helps create a more repeatable workflow and removes the uncertainty associated with unidentified rubber or polymer sheets.

View Laser Plates

Why Buy Your Rubber Stamp Equipment from MaxLaser?

A rubber stamp production system is more than a laser machine.

You need to understand the artwork, engraving process, materials, machine settings and final assembly before you can produce consistent stamps for customers.

At MaxLaser, our approach is based on actually using the equipment and testing the applications we sell.

For this project, we did not simply quote a manufacturer’s specification. We created the artwork, engraved the laser plate on the Thunder Bolt, cut it, assembled the stamp and tested the final impression ourselves.

When you purchase your equipment through MaxLaser, you also have access to the training and support associated with your machine and workflow.

MaxLaser Support Includes

Maxlaser installation and training

Delivery & Remote Training

Lifetime technical support

Lifetime Technical Support

Maxlaser Local South African Support, Stock & Spares

Local South African Stock & Spares


Maxlaser support: hands-on demo facility in Johannesburg

Hands-On Demo Facility

Maxlaser's real business setup guidance

Real Business Setup Guidance

MaxLaser warranty and after-sales

Warranty & After-Sales Backup

Speak to a MaxLaser Specialist

Frequently Asked Questions About Laser Engraving Rubber

Yes, provided the material is specifically suitable for laser processing. Laser-compatible stamp rubber or polymer plates can be engraved with a CO2 laser to create the raised surface required for a rubber stamp.

Yes. A CO2 laser can engrave the stamp plate and cut it to size, allowing the finished plate to be mounted onto a stamp holder.

For professional rubber stamp production, particularly when working with small text and detailed logos, we prefer an RF metal CO2 laser because of its fine engraving capability.

Yes, depending on the design and level of detail required. Glass CO2 lasers can produce stamps with larger text and less demanding artwork, but we have found very small text more challenging on the typical glass-tube systems we have tested.

For high-detail professional stamp production, we prefer RF CO2 technology.

Rubber stamps can contain very small characters and detailed artwork. An RF CO2 laser system is well suited to precise engraving, helping retain fine features that become increasingly difficult as the artwork gets smaller.

It can be possible, but the result depends on the font, artwork, laser system, optics, material and engraving settings.

In our workshop experience, around 7 pt and below is where stamp text becomes particularly demanding, which is one reason we favour an RF metal CO2 laser for fine stamp production.

Yes. The stamp plate must contain the artwork in reverse so that the impression appears correctly when transferred onto paper.

A simple rule is:

Engraved plate = mirrored
Stamped impression = readable

Laser-compatible stamp rubber or polymer material designed for laser processing is commonly used. At MaxLaser, we refer to the stamp material we supply as laser plates.

No. Never assume an unidentified rubber or polymer is safe to laser process. Use material specifically confirmed by the supplier or manufacturer as suitable for laser engraving.

Fine text can be affected by several factors, including artwork size, engraving parameters, focus, material and the laser’s beam characteristics.

Increasing power is not necessarily the solution. If too much surrounding material is removed, you can compromise the small features you are trying to preserve.

Test the actual stamp.

A professional result should reproduce clean characters, fine lines and detailed artwork without unwanted background areas transferring ink onto the paper.

The final stamp impression is the real quality test.

Yes. Custom rubber stamps can form a standalone business or be added to an existing printing, engraving, stationery, signage or personalisation business.

The laser can also be used for other engraving applications, giving the business additional products to sell.

Continue Learning About Laser Engraving

Once you have learned how to manufacture rubber stamps, explore these related MaxLaser guides.

Laser Engraving Acrylic

Learn how we achieved a clean, frosted finish on clear cast acrylic by testing focus, DPI, airflow and engraving settings.

View Guide

Laser Engraving Leather

See how we transformed original handwriting into a personalised leather wallet, including artwork preparation, camera alignment and finishing.

View Guide

Laser Engraving Wood

Learn how different types of wood and MDF respond to laser engraving and how material selection affects contrast and consistency.

View Guide

Laser Machine Maintenance

Learn how cleaning, optics, extraction and regular maintenance affect engraving quality and machine performance.

View Guide

Looking for a Laser Engraving Machine?

Explore our complete range of laser engraving machines for personalised products, signage, manufacturing and commercial production.

View laser engraving machines

Ready to Start Manufacturing Rubber Stamps?

Whether you are starting a dedicated rubber stamp business or adding stamp manufacturing to an existing printing, signage or engraving company, choosing the right equipment can make a significant difference to the quality of your finished product.

At MaxLaser, we can help you put together the complete workflow, from selecting the right laser engraving machine to the laser plates and Max Stamp holders required to manufacture finished custom stamps.

And if fine text and detailed logos are an important part of your production, we can demonstrate why an RF CO2 laser such as the Thunder Bolt is particularly well suited to the application.

View Our Laser Engraving Machines Book a Live Demonstration